Most firearms manufacturers test their product before it leaves the factory, but that doesn’t mean they sight it in. What do you need to do if you get a new gun, or a used one, that doesn’t hit where you want it to? There are many factors that can make your point of aim different than your point of impact, and we’ll discuss some of them with you here.
It sounds obvious, but make sure you have the right ammunition for the firearm. There should be a marking on the barrel denoting the correct caliber. Also, verify the ammunition is reasonably fresh and in good condition.
Correct the sights as necessary using the following guidelines:
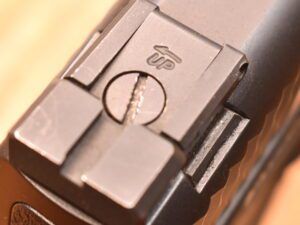
For an adjustable rear sight, move the sight in the direction the bullet needs to go. I.E., if shooting low, raise the rear sight. If shooting to the left, move the rear sight to the right. The majority of the time, these sights should have screws on them that can be turned by a screwdriver. They are usually marked with an “R” or an “L” and an arrow po
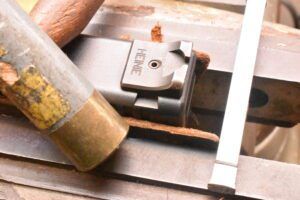
inting in the correct direction or “U” for up as well as the proper arrow.
Many pistols and rifles have a rear sight that only allows movement left or right. These do not normally have adjustment screws and must be moved by an appropriate tool or by force – gentle force. The best way is to use a dedicated tool like the MGW or Wheeler’s tools available at midwayusa.com.
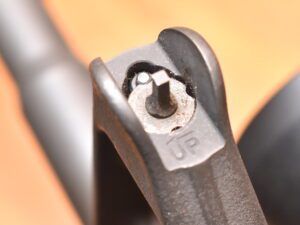
In the case of firearms with a rear sight movable for windage only, the front sight may be the solution. Many will allow the front sight to be changed out – with varying degrees of difficulty. Most modern Glock pistols, for example, have front sights that can be removed via a screw holding the sight on the slide. The hex head screw is accessible from inside the slide. It does require an appropriate wrench. We have used replacement sights from Dawson Precision (dawsonprecision.com) with great success. Dawson even provides the screwdriver needed for the task.
Older versions (and some new) of Modern Sporting Rifles do indeed have adjustable sights but you have to work with both front and rear. Elevation adjustments on many AR-15’s happen at the front sight. A detent pin must be depressed then the front sight is rotated to move point of impact up or down. As with the AK clones, a front sight tool is available that simplifies the process. They are easy to find at places like brownells.com.
Non-removable, fixed sights must be fixed by replacement or filing. See your gunsmith.
A Single Action Army, such as the old Colt .45, that shoots to one side or the other, must have the barrel “clocked” or rotated. See your gunsmith.
The weight of the projectile, especially with a pistol, can have a real effect on how high it shoots. Most modern pistol designs provide for a barrel that unlocks as the slide moves to the rear shortly after firing. As the slide continues the rearward movement, the rear of the barrel tilts further down which, of course, means the muzzle points up a bit. All other things being equal, lighter (or just faster) bullets tend to exit the muzzle sooner, before the muzzle reaches full tilt, and strikes slightly lower on the target. Heavier bullets exit later and impact higher. If your 9mm impacts a bit low while shooting 115 grain projectiles, try 124 grain or even 147 grain bullets and see where they hit.
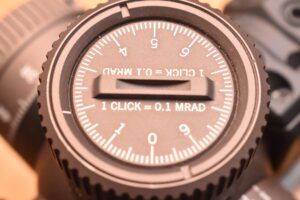
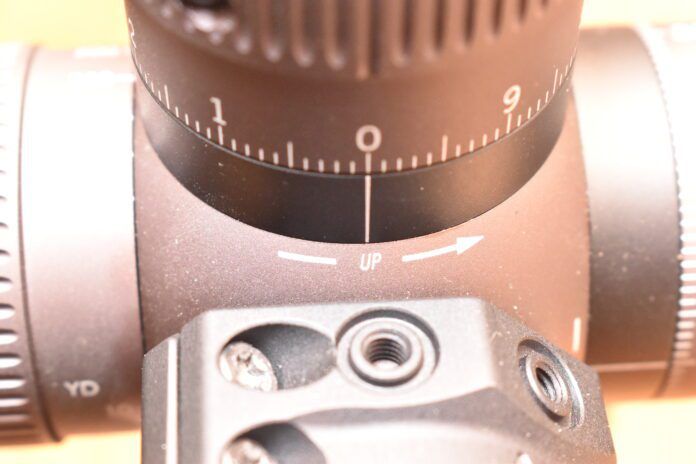
Magnified optics for long guns tend to be fairly intuitive – unless they aren’t. Most will have turrets located at 12 o’clock and 3 o’clock somewhere near the middle of the tube. The high, center turret controls elevation and the right-side turret controls windage. The majority of American made optics provide consistent adjustments whereby turning the top dial clockwise will lower point of impact. The same movement with the right-side dial will move POI to the left. Just to be confusing, it seems, optics made for the European market are opposite with clockwise movements making shifts to the right and up. Adjustments will normally be measured in Minutes of Angle or Milliradians (Mils). They are simply different ways of dividing a circle. A single Minute of Angle subtends 1.047 inches at 100 yards (round it off to an inch) so your quarter MOA adjustment will change POI .25 in. per 100 yards (2/4 in. at 200 yards, ¾ inch at 300 yards, etc.) One mil is a yard at 1000 yards or 3.6 inches at 100 yards. Your .1 mil adjustment therefore moves POI .36 inches per 100 yards. Read your manual.
Keep it simple and remember that, unless you have to work with the front sight, move the sight or optic the direction you want the bullet to go.







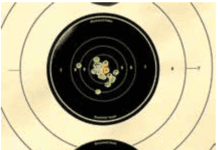

Good basic article on the art of sighting in a firearm. One thing missing is something I learned years ago, while shooting on our State High Power rifle team. It does not take a lot of ammunition, or time to do sighting correctly, if you follow one simple rule. The ABC of shooting… Aim, Breath, Control. Set up, take careful aim, breath, and squeeze the trigger until sear break. If this is done correctly, that first shot should show the point of impact (POI), where your firearm will place shots. If you have done this correctly, you can measure the first shot location and make your first adjustment. Follow the same procedure again, ABC, and take a second shot. Your second shot should be much closer than the first. Measure again and make another adjustment. Follow the same procedure a third time. Generally, when you follow the same procedure again, your 3rd shot should be very nearly dead on. Way too often, people go to the range with a new to them firearm or loaded down with extra new to them ammunition, and haphazardly set up and quickly shoot 3-5 rounds to ‘guess’ where the group center is. They do this many more times than necessary and waste a lot of time and ammunition. They also heat their barrel up which will change many things that will affect POI. Using this simple ABC method, the barrel never gets ‘hot’ and takes that out of the equation. Remember, 9 times out of 10, the first kill shot while hunting is that critical first shot through a cold barrel.