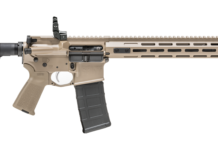
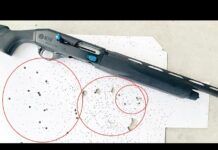
In the September 2013 issue we tested three of the AR-15 rifle types, and found some limitations among them. For example, we replaced the horrid trigger in the Bushmaster Carbon-15 with one of the excellent Geissele (pronounced GUYS-lee) SSA-E triggers. That trigger was such a revelation we immediately wanted to replace the triggers in the other two with the aftermarket ones on hand, but waited until now to try them.
We had on hand a Timney 668-S trigger that was supposed to give a 3-pound break. We had another Geissele trigger, the Hi-Speed National Match, to try. Besides triggers, we had two different types of butt stocks by Magpul. These were the easily-changed MOE, a mil-spec item that gives you several benefits; and the UBR stock, which requires some gunsmithing to install because you have to replace the original stock extension with Magpul’s.
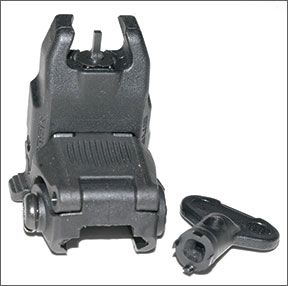
We also had other items from Magpul that we were glad to see. These were an add-on set of “iron” sights that were designed to clamp onto Picatinny rails. We had a front and rear, the so-called MBUS set, but none of our rifles had a forward rail, so we could not try the front sight. Two of the rifles had forward sights, and we were thus able to test the aperture rear sight on them.
We had a final item, which some shooters seem to like a whole lot. That’s the costly Slide Fire mechanism, which permits rapid-fire shooting of any of the AR-type rifles. With all these parts in front of us, we got busy with the original three AR-15s, which were the Rock River Arms LAR-15, the ArmaLite M15, and the Bushmaster Carbon-15. Rather than try all the parts on all the rifles, we put them where they seemed most appropriate, or as in the case of one of the stocks, the only place they’d fit. Here’s what we found.
Magpul MBUS Aperture Sight, $58
Installing this handy sight requires only a screwdriver to remove a cross screw. Then you slip the sight onto the rear of the rail, align it with the first slot, and stick the screw back in. That’s it. The sight stores flat until you want it. Then a push with a finger pops it up. It has two concentric apertures, a small one (0.070 inch) for greater precision and a larger one (0.190 inch) for more speed. There’s a thumbscrew to adjust windage, but elevation changes have to come from your front sight. We tried the Magpul rear sight for fit on all three rifles, and shot it a bit on the ArmaLite and Rock River, both of which had forward sights. With the Rock River we had difficulty fitting the sight to the rail, which seemed to be on the too-wide side. We had to tap the sight to get it on, which didn’t seem right. However, it slipped easily onto the ArmaLite and onto the Bushmaster Carbon-15. We suspect the Rock River rail was at the outer limit of allowable size.
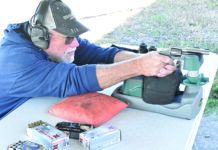
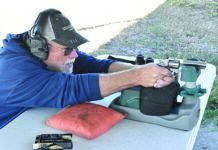
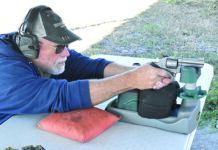
On the range with the ArmaLite, we made groups at 50 yards of 1.5 inches from a shaky sitting position. We then shot the rifle in our machine rest at 100, and fired groups of just under 2 inches with match ammo. We had to raise the front sight about one turn to get it where we wanted it. The Magpul’s windage adjustment was snug, stayed where you put it, had no slop, yet was easily moved with the fingers. There were reference marks to guide you. The sight locked firmly up or down without shake or rattle in both positions. The small aperture could be pivoted forward out of the way, leaving the larger hole. You could drill out the smaller one somewhat if you wanted to. We were happy with it as it was.
Our Team Said: This sight was well thought out, well made of reinforced polymer, affordable, and seemed plenty strong for the job.
Gun Tests Grade: A
Magpul 20-Round Magazine,PMAG 20, GEN-M3, $14
We thoroughly tested the Magpul 20-round magazine in all three rifles, and gave it a clean bill of health. We particularly liked its spring-loaded cap, which should help keep the ammo in it clean and ready to go.
Our Team Said: There are other capacities of this magazine by the same company, but we liked the 20-round one for easy use off our bench.
Gun Tests Grade: A
Magpul MOE Mil-Spec Carbine Stock, MAG-400, BLK, $60
MOE stands for Magpul Original Equipment, and means these parts are designed to replace the original parts while retaining original function, with perhaps some added benefits. We put this stock onto the ArmaLite M15, as it was the only one with a mil-spec stock post. To get the old stock off, it’s only necessary to withdraw the spring-loaded pin sufficiently far to permit it to clear the stock post. This is easily done by lifting up on the release lever. A similar pin on the MOE has to be lifted (use padded pliers) to permit the replacement stock to slip on. The Magpul unit fit perfectly and functioned perfectly. It rattled less than the original, but that was not all.
There were three main benefits. First, the latch is protected so that you won’t accidentally bump it and collapse the stock when hunkered down in brush, or in some situation that might cause unexpected pressure on the standard latch. The latch on the Magpul is protected by a bar, yet the stock can still easily be lengthened or shortened. We thought its design was superior to the original.
The next benefit was the thin rubber buttplate that, at the very least, kept the rifle from sliding when you stood it in the corner on a slick floor. It was unneeded for recoil, and in fact was so hard that it would not have any significant effect in that quarter. If you need more extension, Magpul sells a 0.7-inch-thick pad for about $20.
The third benefit of this drop-in stock was that it entirely eliminated the nasty ridge at the front of the moving part of the stock, so that when you cheek the gun, you no longer get a fat lip from the pressure of that ridge.
There’s a notch through the protective arm for a sling, and a hole at the bottom of the butt is another attach point. The price of the unit puts it in reach of just about everyone. There’s also a commercial version to fit their slightly fatter stock posts at the same price, and both are available in a few different colors.
Our Team Said: We thought this stock was a quality item, well made, reasonably priced, and mighty useful.
Gun Tests Grade: A
Magpul UBR Stock MAG330-BLK, $265
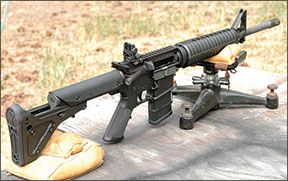
That may seem like a high price for a stock, but you get a lot of machinery for that price. You get a well-made, solid-setting, rattle-free stock extension that also has a (reversible) storage compartment for odds and ends. The stock extension can be preset for your desired length. The stock has a smooth, comfortable area for your cheek that never moves, and should thus more easily let you get the most out of your rifle.
To install the stock, we first needed to buy a stock wrench to remove the standard stock extension, or post. We bought one from a supplier for about $7, and expedited shipping gave us a bill of $25 for the wrench. Magpul’s instructions recommend using the services of a trained AR-15 armorer, or a qualified gunsmith, to make sure the stock gets mounted correctly. If you don’t know how, either ask someone or have a qualified person do the job for you. The new stock post needs to be torqued to a specific tightness, for instance, and there are tiny parts that might get lost.
We wanted to mount this stock onto the Rock River rifle to see if we could wring out more accuracy from it. However, we were unable to release the lock nut on that rifle, and bent our new wrench trying. The lock nut on the Rock River was far too tight, in our opinion. We instead put this stock onto the ArmaLite, having first assessed the neat, low-cost MOE Carbine stock on that rifle.
The ArmaLite stock post or extension came off easily with our new wrench and, following the instructions that came with the Magpul, we attached the new stock post and torqued it properly. When we tried to slip the fixed portion of the stock onto the post, we hit a snag. The small Allen screws that pass through the outer covering protruded into the raceway for the new stock extension, and the stock would not go on. We loosened all four of these small Allen screws and then were able to slide the stock onto the tube. The instructions mentioned nothing about this and only noted you might have to use a rubber hammer to drive the piece fully into place. The only other trick was to make sure the spring for the rear action-pin detent goes back into place properly. A single screw holds the fixed part of the stock onto the new stock extension, but the four small Allen screws also bite slightly into the post when they are retightened. This glitch ought to have been addressed by Magpul in the instructions, we thought, or the screws made shorter. However, the stock function in use far outweighed any difficulties in installing it.
The stock unit is relatively heavy, about 1.5 pounds in all. But for those with heavy match barrels, and maybe a handful of other weighty accessories stuck on here and there, what’s a few extra ounces on the butt? Also, this unit works on 30-caliber versions too, where weight is less of an issue.
With the unit in place, there was absolutely no motion to any parts of the stock no matter where we put it. Once it was adjusted for our chosen length, the stock might as well have been a fixed stock, it was that solid. To extend or collapse the stock, you have to pull a lever rearward with your finger. Sometimes it sticks, and requires a strong pull. However, it locks the stock in position tightly, as though it were welded in place, so a sticky lever is a small price to pay for that solidity. The stock unit has a series of holes into which you can put a screw as a permanent preset stop, once you have chosen your desired length. A spare screw was thoughtfully provided within the stock unit. You could thus have two solid presets if desired. The preset can be overcome by pressing the right buttons in sequence, and the excellent manual that comes with this unit explains it all very well.
Our Team Said: We noticed a huge difference between this rifle and the others in the feel after the shot. With the fixed (yet adjustable) Magpul UBR stock, there was none of the thump you get with the normal A4 stocks on the AR-15 setup. There was, of course, no motion to the stock at all before or after the shot.
Gun Tests Grade: A
Timney 668-S Trigger, Small Pin, 3-Lb. Pull., $195
The Timney is made in the U.S.A. and has a lifetime warranty. This trigger went into our Rock River rifle. In fact, it practically fell in, installation is that easy. We were quite fed up with that rifle inasmuch as we could not get decent accuracy out of it, had found the stock extension essentially unremovable so we could not try the Magpul UBR stock on it, and had to force the Magpul rear sight into place. So all we did with the Rock River was try a new trigger, leaving the rest of the rifle in the condition in which it came to us. The Timney trigger was a dandy. Installation took only a few seconds, and that’s about all. The instructions are simple but could be a whole lot simpler if you know a little trick.
Removal of the original hammer and trigger are done by simply driving out the two pins. No problems there. Then it’s necessary to remove the safety, and here’s the trick. Don’t remove or loosen the grip. Instead, turn the safety between its full-on and full-off positions and give it a whack on the right side with a suitable non-marring drift. It’ll pop right out. Drop the Timney trigger into place loosely, and then reinstall the safety by pressing the still-captive plunger in the receiver down with a small screwdriver, and push the safety home with your thumb.
The original hammer and trigger pins are then stuck through the rifle to retain the trigger. They will catch the trigger assembly loosely, but they need to be temporarily retained with tape while you tighten two set screws in the trigger assembly with the Allen wrench provided. Done! Take the tape off and put the rifle back together.
With the excellent Timney design there’s no messing with trying to hold spring pressure while you attempt to slip a pin through three holes, no messing with slave pins, no making sure the spring arms are in the right place. With the Timney, all the springs are already in place and you don’t have to fight anything. The hardest task was slipping the Allen wrench past the spring arms, which was easy. If you have a plastic receiver, there are two locking set screws that have to go down on top of the already-installed ones you just tightened.
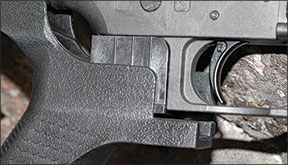
Timney also sells a trigger that is skeletonized. The cost is slightly higher. From what we experienced, we don’t know how the slotted trigger could improve this setup to any extent, but it does look good.
Our Team Said: The superb Timney felt heavy at 3 pounds after the controlled tickle of the Geissele Match setup. But the Timney was still a quality item, we thought, far, far easier to install than the half-day required for the Geissele Match unit. The Timney trigger broke at a measured 3 pounds, just like it was supposed to. This is a single-stage trigger with a mighty clean break. Unfortunately, it didn’t let the Rock River shoot any better, but we were not surprised. The RR had a decent, if heavy, trigger to begin with. The Timney trigger made it into a better rifle.
Gun Tests Grade: A
Geissele SSA-E Trigger, $230
The letters stand for Super Semi-Automatic Enhanced. Geissele has another trigger that used for fully auto rifles, hence the SA designation here. As noted in our September report, this trigger dropped into the Bushmaster Carbon-15 without any problems, and we declared it to be a fine two-stage trigger, well worth the price in our opinion.
Our Team Said: It gave a superb, repeatable, 3.5-pound pull that the Carbon-15 desperately needed.
Gun Tests Grade: A
Geissele Hi-Speed National Match Trigger, $279
We installed this trigger into the ArmaLite rifle, which had won our accuracy test against the other two rifles in our previous report, despite its heavy original trigger. Installing this match trigger was a huge job that took us half a day, we being unfamiliar with its requirements. We followed the detailed instructions, but even better, we found a series of YouTube videos linked at the Geissele website (geissele.com). The vids were a big help to us. What you get for your money is a choice of three setups. Three mousetrap trigger springs came with the trigger unit, one for mil-spec matches; another, lighter, one for DCM use; and the one we used, which was lighter yet. We wanted to get the lightest possible trigger for our test use.
Installation requires knowing what you’re doing. The videos explain the steps, and so does the instruction sheet that comes with the trigger. You get an installation tool, grease, oil, three Allen wrenches, the trigger and the hammer, and two dedicated pins that are used once everything else is installed and adjusted. The rifle’s safety must come out (see our trick above), and then you install the trigger using the long dummy pin that is provided. Then you have to check to see if the safety will clear the trigger. For some reason the trigger is made with a wide spot at the back. Our safety didn’t clear the trigger, so we used the recommended Dremel with a cutoff tool to remove some of the safety metal as detailed. Our first effort got us in business. Next was to measure the first-stage pull to see if it was to our liking. It was 2.1 pounds, which we left alone. You can tune that by bending the spring arms if you like.
Next you need to install the hammer. It didn’t fit, as we found after we struggled with it awhile. We had to file the ends of the hammer boss to let it clear the sides of the receiver, against which it was dragging. To verify that, we took off the mousetrap spring and put just the hammer in the rifle. It dragged badly, so we filed it to clear. That was not mentioned in the instructions. In went the hammer with its spring. We verified the spring legs were in the right spot, and then we went to work adjusting the trigger. This was a tricky deal that was well explained, and we won’t detail it here. Suffice to say that despite presetting by the factory, it’s necessary for you to readjust the engagement of the sear, the weight of pull of the final stage, and if desired, the overtravel. With all that done, you finally install the correct pins for the unit, making sure they’re oiled with the supplied oil, grease the sear with the supplied grease, and measure the final break weight. Then try the trigger 50 times, and measure the weight again. It changed very slightly, but we didn’t see a need to readjust anything. The first stage took 2.2 pounds, and the final break came at 2.7 pounds. The end of the first stage is like hitting a brick wall, so in practice you take up the slack, and when the rifle points exactly right, you “send it” with just a tickle of half a pound more pressure, entirely under the shooter’s control.
This was a dream of a trigger, one of the best we’ve ever experienced. We could do things with it we’ve tried to do for many long years with things like set triggers, but this has ‘em all beat. Until you experience it, you won’t quite comprehend, and after you do, you’ll have to have one in your rifle. It’s one doozie of a trigger. We can only assume those needing the stiffer DCM or Service triggers will be equally pleased, but the letoff pressure will, of course, be higher.
With the solid yet adjustable Magpul stock installed, and with the Geissele Match trigger in the Armalite, and with our 36x Weaver on it, we went to work. We shot it a little to let things settle, then got groups of 0.5, 0.9, and 0.7 inch for an average of 0.7 inch with the excellent Black Hills 68-grain Heavy Match ammo. This was 0.2-inch smaller than we had done with the rifle with its original equipment. While that may not seem like much, it was far easier to accomplish, and we expect the rifle to shoot even better once we’re used to that incredible trigger.
Our Team Said: Undoubtedly, the Geissele Hi-Speed National Match Trigger was an A-plus trigger, though the installation — which took nearly half a day — rates a resounding D. No, make that a C with the use of the online YouTube videos kindly provided by Mr. Geissele. The bottom line is, beauty is as beauty does, and this beauty really does a fabulous job for the shooter.
Gun Tests Grade: A+
Slide Fire SSAR-15, $370
Finally we come to the rapid-fire gizmo that has been staring at us for some time now. We chose to put it onto the Bushmaster Carbon-15, which had the Geissele SA trigger on board.
There was a plastic stock and a small part that replaces the original pistol grip, and an Allen wrench. The Slide Fire was mighty easy to install. It required removing the grip with the Allen wrench provided, and replacing it with the odd piece of plastic that came with the stock, securing it with the original stock screw. That was easy enough. Then we had to remove the original collapsible stock and slip on the Slide Fire unit. Again, no problems, and that’s all you need to do. There’s a single control on the Slide Fire unit that consists of a spring-loaded button with two positions. In the locked position the stock essentially functions normally, and you have a loose but effective-enough stock on the rifle.
With the control button pulled slightly out and twisted 90 degrees, the Slide Fire is in its ready-to-go mode. The whole idea of this stock is that it slips back and forth rapidly while your trigger finger continuously trips the sear. With your finger in position on the trigger, forward pressure on the forend causes the gun to fire. The rifle’s recoil resets the trigger — or is supposed to — and the continued forward pressure on the forend and rearward nudge by your trigger finger causes the rifle to bounce back and forth as round after round rips out quickly, under your careful control. Thus you can get the effect of a fully auto gun with none of the legal hassle associated with such items.
But it didn’t work for us. We got a couple shots to go quickly, but the rest were single shots followed by a pregnant pause as we waited for the system to work. We could easily control where the shots hit, using the red-dot electric sight on the Carbon-15, so accuracy was okay. But the rapid-fire burst of shots never happened. Was the excellent Geissele trigger part of our problem? We don’t know. We didn’t get used to the setup at all before we ran out of ammo.
A reliable source told us that an operator with some experience with the Slide Fire can make machine-gun sounds fairly easily, and the rifle is easy to control while so doing. Our comment is, good for them, and we hope they have fun with this system, and enjoy wasting tons of hard-to-get ammo.
Our Team Said: Practically speaking, there might be 10 minutes worth of fun with this system for an experienced rifleman, but to leave the Slide Fire system on the rifle all the time seems silly. The stock is loose, rattles a lot, and access to the safety is compromised. The collapsible feature of the A4 stock is also lost. However, the Slide Fire has a lifetime warranty and a money-back guarantee, so there’s not much risk if you buy one of these. The cost seems awfully high for what you get, compared with some of the other truly worthwhile accessories tested here, and we’ve barely scratched the surface of the AR-15 add-ons. We’d buy ammo with our money instead of throwing it at the Slide Fire.
Gun Tests Grade: C


