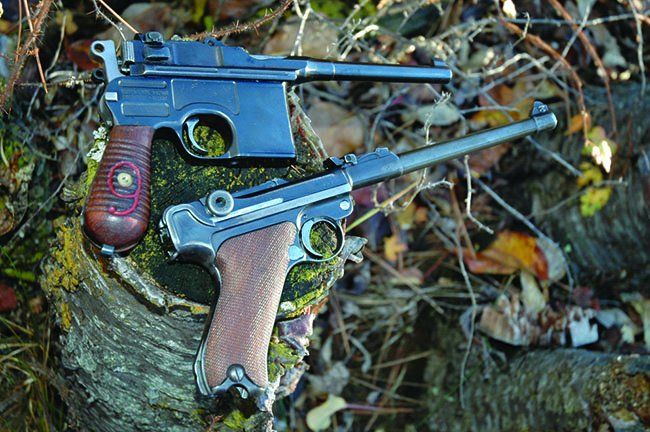
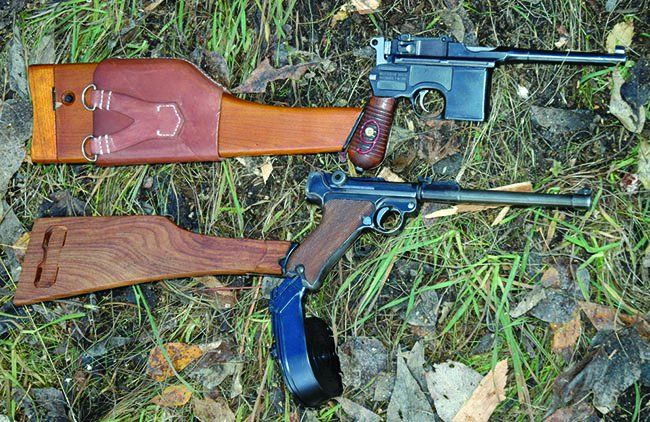
We were delighted to have this pair of rare and costly 9mm handguns to evaluate, thanks to a collector in Houston who sent them along with a bunch of fine accessories to our Idaho office. They were an Artillery Luger (about $2500) and an 1896 Mauser Broomhandle (about $2000), both with very good bores and in overall nice — though refinished — condition. Accessories for the Luger included a new wood stock, two eight-round magazines, a new 32-round drum magazine with loader and leather pouch, and a reproduction leather holster with a two-magazine pouch. The Broomhandle came in a new wood shoulder-stock/holster with leather, and a bunch of stripper clips.
Regarding the Artillery Luger, one must remember these guns are all very old. They were used a century ago in the First World War, this one having been made in 1915. They saw hard and heavy use and there are not a whole lot of them left. Those with pristine finishes command prices in the realm of $5000 on up, depending on condition and relative rarity of the individual gun. Thus, the price for this one is within reason for a good-looking representative sample with what we thought was an excellent barrel.
The Mauser looked at first to be pristine. However, we soon found out it had been refinished by a master who maintained all the markings and original surfaces very well indeed. There was some pitting here and there, such as under the grip areas and along the sides if you looked carefully, but whoever did the rework really knew his stuff. The subsequent bluing was probably done by hot-dip process, as there were none of the signs that accompany rust bluing. Nevertheless, the gun looked just great. Sadly, that was the only good part of this gun.
We tested them with two types of ammunition, 115-grain Independence FMJs and Black Hills 124-grain +P JHPs. Without further ado, here’s what we found.
Artillery Luger P08 9mm Luger, ~$2500
It’s late in the war and the enemy is fast approaching your machine-gun nest. Suddenly, the machine gun jams and your job begins. You and a handful of other servicemen now have to defend the nest against oncoming forces, so you grab your lange Pistole 08 with its drum magazine holding 32 cartridges, elevate the rear-sight slide to the specified 600 yards, put the flat stock tight against your shoulder and, with your buddies, cut loose at the advancing enemy. We are talking, of course, about the most common original use of what has become known as the Artillery Luger, though the Germans knew it as the Long Pistol 08, and the war in this case was the First World War. During that conflict, the Artillery Lugers were generally used to protect machine-gun nests and artillery installations. The guns were commonly fitted with removable shoulder stocks made of simple slabs of wood, which made them into fairly useful carbines. The cartridge was the then-new 9×19 Parabellum, or 9mm Luger, which came into being in 1902. First adopted by the German navy in 1904, that country’s army took it up in 1908 (some sources say 1906) and the rest is, well, history.
The earliest loads for the 9×19 featured a truncated-cone bullet of 124-grain weight. Shortly after the beginning of WWI, the Germans changed the bullet to a round-nose configuration similar to what is commonly seen today in FMJ rounds, the weight remaining 124 grains. (Thanks to Lewis Curtis’s “Introduction to 9mm Parabellum” at CartridgeCollectors.org for this hard-to-find information.) Unfortunately, we don’t know the original velocities of these early rounds. Best guess would be in the neighborhood of 900 to 1000 fps out of the long-barreled Luger.
Our first impression of the long Luger was that it felt just great. It was well balanced, and if you didn’t look at the barrel, you might not otherwise notice its extreme length. We had been prepared for a muzzle-heavy weapon, but that was not the case at all. The barrel had thin walls, and the extra length was only noticeable in the gun’s need for a longer holster. That fine balance was a most pleasant surprise to us. The next happy note was the trigger pull.
These are commonly bad to horrid on Lugers. Not here. This was an excellent trigger by any standards. It was not a hair trigger, requiring 5.4 pounds to let it off, but it was entirely controllable with minimal to no creep. The gun turned out to be not what you’d call a tack driver, but with the right ammo we felt a serious target shooter could be competitive and would have a whole lot of fun with one of these in NRA centerfire matches. And he could even adjust the sights.

The front sight was adjustable for windage. This required a small tool with two pins sticking out the front, which we didn’t have, but which would be simple to make. The rear sight was adjustable for elevation by means of a slider, which gave enough elevation for 800 yards. The sight picture was the common German small inverted V front blade nestled in the rear sight’s small upright V. Our shooting team thought the sights and the sight picture were not ideal for target shooting, but would be okay for someone with good eyesight. However, this was not designed for punching paper. It was a serious military weapon, and that is the light in which we examined it.
The gun’s finish had been redone long, long ago. All the velvety and dead-flat rust bluing of the original was gone, leaving slight dishing on the markings and rounded-over flat parts all over it. While the job was not horrid, it was not at all good. The other test gun, the Mauser, had been redone by a master, who left all the markings sharp and all its corners okay and the flat areas flat. Pity he wasn’t the one who redid this old Luger. The good part of the Luger was that all the numbers matched, including the firing pin, though not the magazine. Two magazines came with it, one with the old-style wood plug in the bottom, and the other a modern replacement by Mec-Gar ($37). The original fed entirely reliably with both types of ammo, but the new replacement was not so good with the hotter JHP Black Hills ammo.
In the refinishing process, someone who ought to have known better took all the straw-colored hardened bits — including the trigger, safety, ejector, and takedown lever — and polished them, thereby destroying more of the gun’s collector value. The straw coloring is not exactly durable, but it does add greatly to the aura of the gun. The wood grip panels were also in fine shape, though the tops were worn off the checkering diamonds. The mechanism was all crisp, though the safety’s operation was on the too-loose side, we thought.
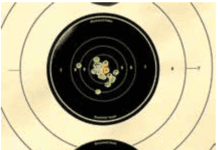
Our accuracy testing gave about 2-inch groups with the Independence 115-grain rounds and a bit better with the hotter Black Hills 124-grain ammo. That is not as good as we hoped, but test conditions were miserable, with rain falling on top of heavy snow on the ground, and we believe the gun would do much better under better conditions. Our five-shot groups showed many rounds touching, with one or two shots enlarging the groups. One group of the Black Hills had four shots in 1.2 inches, and some of the three- or four-shot clusters with the other ammo were within half an inch. We tested without the use of the shoulder stock because we found the stock to be largely clumsy, and it put the gun and its sights too close to our eye. We had many failures to feed with the hotter ammo, and one or two with the new magazine and the 115-grain ammo. The gun clearly favored the 115-grain full-metal-jacket rounds and the original magazine for smooth and reliable function.
The Luger came with a newly manufactured drum magazine that we just had to try. The magazine was made by Numrich (Gunpartscorp.com), and that company kindly supplied all the accessories. The drum magazine had all the characteristics of the originals. These drum magazines gave the Luger shooter 32 rounds. Commonly, those troops using the drum magazines were issued several, which were hung from the belt in some kind of holster or pouch. Photos of those used during WWI show them apparently to have been made of some soft material, but our drum magazine came in a new and very stiff leather pouch. While the workmanship on the pouch was very good, the magazine was so tightly held that it took several tools and nearly an hour to get the magazine out, which is not what you want during an armed conflict. We also got a new black-leather holster for the gun, along with a lovely leather holder for two eight-round mags complete with shoulder strap. The holster had a cleaning rod included, and all the black leather goods looked to our amateur eyes to be pretty close copies of original German equipment. We would avoid the leather pouch for the drum magazine and save ourselves a bit over $47, but we liked the beautiful long holster and the two-mag pouch, which were part of a set that also included the beautiful plank-like shoulder stock, all for $170.
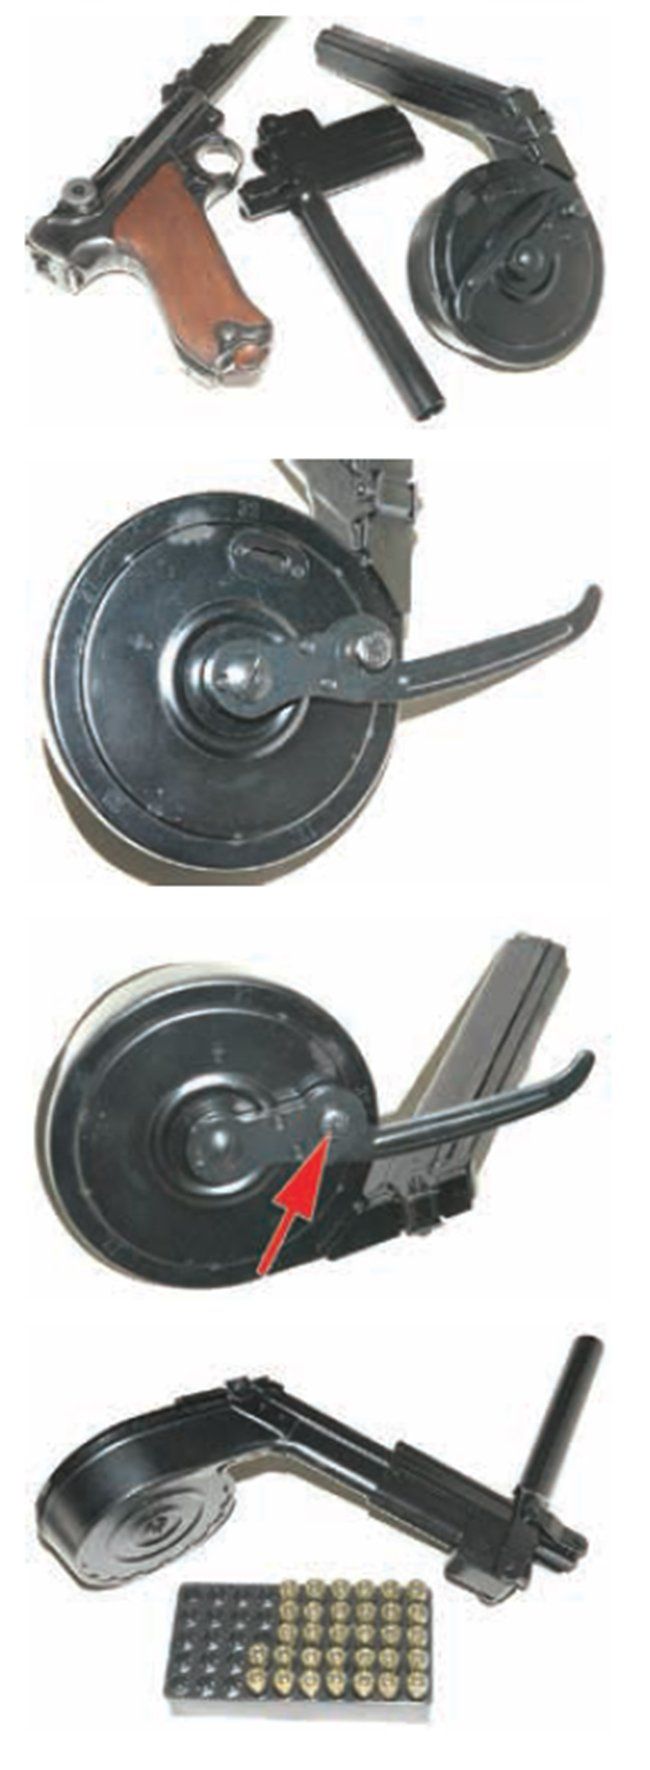
We loaded the drum magazine with 115-grain FMJ, which we thought would give it the best chance to work properly. To load it, the technique is to first cock the extremely powerful spring inside it by extending the lever and hauling on it. Be careful! It slipped once and gouged a chunk out of a tester’s chest. First, the spring must be locked securely in the fully tensioned position by means of a small button. There is another spring inside the magazine that must be overcome, this spring being responsible for feeding the final dozen rounds after the coil spring has done its job. We found it easiest to load a few rounds by hand with the mainspring cocked and locked. Then we put on the loading device that came with the drum magazine as part of the kit ($400). This was essentially identical to the original German setup.
It is mandatory to have the loading device to fully load the drum magazine. This loading device slipped over the end of the magazine, where it locks in place. To get each round in, the lever is pressed, driving the already loaded rounds down into the drum. This takes lots of force as the drum nears capacity. With the lever depressed, a new round is placed on top of the magazine in the resulting gap. Releasing the loading lever lets the new round slip easily back into place. This was unusual, worked like a charm, and seemed like magic. As noted, it took lots of force to get the final rounds into the drum. With all 32 rounds loaded, the main spring must be released, and one does that with the loading tool still in place. Again, do that with great care.
With the main spring released against the stack of cartridges, take off the loading tool by pressing a button. Off it comes and you’re ready to go.
The drum magazine was an extremely tight fit into the gun. This gave us fits. The force needed to get the magazine into the gun commonly caused it to go in too far. We then had to forcibly pull it out until the magazine lock snapped in place. Then, and only then, would the rounds feed. And feed they did! We ripped off quite a few, rapid fire, offhand, noting that the gun was easy to use, and recoil was greatly reduced by the 2.4 pounds added to the gun by the fully loaded magazine. We then decided to try the stock, but discovered it had to be put on with the drum removed. More agony, but we got the drum mag out, the stock on, and the drum back in. We then found the setup to be clumsy, and the short stock placed the gun much too close to our face. We thought a competent handgunner would be far more comfortable using the gun with the drum without the stock. As noted, the drum mag worked very well for the most part, but unfortunately we had failures to feed during the firing of the last 11 rounds. We had a double, followed by a failure to feed, clearing of which required removal of the magazine. Note that the Luger cannot have its safety put on with the toggle open. Therefore, jam clearings must be done with the gun in firing condition, and extreme caution must be used. We pulled the mag, cleared the jam, and tried again. We again got a failure to feed, and gave it up for the final six rounds. Actually, we were ecstatic that the first 21 rounds had worked perfectly, with that ungodly powerful spring shoving against them. We believe the secondary spring was too weak for the system. It seemed to be a much lighter spring than that found in the standard magazines, which generally require a tool to pull down the follower for the final two or three rounds.
Our Team Said: We liked this gun very much. If we wanted a Luger, we’d get an Artillery model. We are still somewhat in awe of the fine balance of this old pistol. It has been said the Lugers were designed to balance the force of the ammunition’s recoil with the dynamics of the toggle. That means one’s search for the best ammo could pay great dividends in reliability and, most likely, accuracy. We would buy a gun in similar condition as well as the drum magazine with its accompanying loading tool, as well as the holster, mag pouch, and stock group. We’d pass on the drum pouch.
The overall handling of this gun is not for beginners. First, to load it from the ten-round stripper clips, you have to lock the bolt rearward, which is done by pulling the bolt all the way back on the empty magazine. The follower then locks the bolt open. As soon as you load the ten rounds and pull out the stripper clip, the bolt flies forward and chambers a round. But you cannot pull the bolt back to load the gun without putting the safety in the firing position. So youre stuffing rounds into a gun thats all ready to shoot. Therefore, once the ten rounds are stuffed into the gun and before pulling out the stripper clip, be sure the gun is pointed in a safe direction. Thats just ducky in a wartime situation and when the gun always works. But what if you have a jam!

Once you have a jam (we had plenty of them) you have to manipulate the bolt with one hand while fishing out the problem with the other. We had an empty case stick in the bolt face with a fresh round jammed towards the chamber. The clearing of this was exceedingly dangerous. We were able to hold the bolt open while retrieving a suitable tool with the other hand and then pried the stuck empty out of the gun. We then eased the bolt forward and got it going again, but in cold, wet, dark conditions as we found them on our range day, this was not the happiest sort of gun testing weve done.
We had other problems with the 1896 Mauser trying to get it to work. We tried the Black Hills 124-grain JHP load first, and after one shot stopped to wipe the blood off our hands and the back of the gun. During recoil, the hammer on this one was vicious in the extreme. We slid our hand down the grip and tried another shot, and after two attempts the round fired. The gun flipped so badly we then resorted to grabbing the front of the magazine with our off hand, but the gun still kicked up and out of it whenever it fired. We had to drop the hammer at least two times for each shot, and then it got to be three, and eventually it failed to fire a round after four attempts.

We took the gun down for cleaning and photos, and it was then that we discovered the problem with the Black Hills ammo not chambering fully. The problem was that the Black Hills bullet had a slightly straight side to the bullet that protruded into the lands, requiring the seating effort of the driving hammer before the firing pin could dent the primer properly. We had better luck with the Independence 115-grain FMJ, but still had misgivings about its ability to reliably fire a shot, or feed, or eject properly. This sort of thing does not build confidence in the shooter. The second, milder ammo gave much less muzzle flip, and slightly better accuracy and reliability, but enough failures to fire and feed that we quickly lost all interest in this handgun.
Takedown is simple. Clear the gun, and then release the bottom of the magazine and take it off with the attached follower and spring. Then cock the hammer and lift the little tab under it. Now you can slide the guts out the back and watch as a few fitted parts fall out. They go back in easily, so dont fret. Once inside the gun, we found that none of the numbers matched, or were even close to each other. When we broke the gun down, we found it impossible to get the cross pin out that holds the bolt into the breech area of the barrel. We tried long and hard but had to give up, as we didnt want to force or break anything. The rest of the takedown procedure worked just fine, though, revealing the massive amounts of thoroughly machined parts inside these old guns, and thats always a treat to see.
Our Team Said: All in all, we thought this was one of the worst guns weve tested. Its accuracy was on the order of 2.5 inches with both types of ammo, which was not horrible. But unlike the Luger, there were no clumped shots and thus no promise of increased accuracy in better weather. The 30-caliber version we tested in January 2011 was utterly reliable, and had about the same accuracy. It also had all-matching numbers, which in our experience is a good place to start if you want a reliable old complex auto pistol. This one fired most of the time with the Independence ammo. It may be that the gun will work better after a search for its favorite ammo.
It took lots of effort for us to avoid pitching the Mauser into the woods – and were not alone. As one well-informed source told us, this particular version of the Broomhandle never got officially accepted for any sort of military use. It just doesnt work. We read the German military ordered some 150,000 of these in 9mm during WWI, which probably hurt their war efforts.
Written and photographed by Ray Ordorica, using evaluations from Gun Tests team testers. GT


