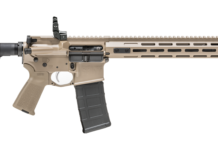
When I first saw the much-praised and oft-maligned AR-15 rifle, it was dressed in green, and still had an Armalite logo on the side of the lower receiver. The ammunition designation was not 5.56mm, but the familiar .223 as manufactured by Remington. It was the summer of 1962 and I was privileged to be on hand for the unveiling of the arm that was to replace both the M-2 Carbine and the M-1 Garand Rifle, as well as the short lived M-14.
To the best of my knowledge, those of us in that Small Arms Instructors Class were the first active-duty troops to learn the disassembly, assembly and basic maintenance procedures associated with this arm.
Lackland Air Force Base had been given the job of doing the acceptance testing on the AR-15 (later to be the M-16) for the Department of Defense and I was also privileged to be associated with the last stages of that testing in 1964. As I recall, some 25 changes were recommended—and made—as a result of those tests.
Most of them would be hard to find unless you had an original item and a current arm to compare. Things like beveling the right rear corner of all the locking lugs on the bolt are not that obvious but kept a lot of bolts working a lot longer than the originals.
With more experience under combat conditions and general usage, such features as the bolt assist (slush pump), fire-burst limiter, rounded handguards, a rear sight that adjusted for windage and elevation without the use of a bullet point, and a pistol grip with a storage compartment and finger protrusions were added. More recently, barrels have gotten heavier and carbines chambered for 9mm Parabellum and 7.62 x 39 Russian have been added, though I have not heard of the last two being issued to the military.
I have personally built a number of rifles chambered for an interesting caliber which makes the AR-15 deer-legal in many states that forbid the use of .22 centerfire cartridges, the 6mm x .223.
Here are some of the more common equipment failures and how they can be avoided or fixed:
Cleaning, Lubrication
Contrary to a popular myth started by some ill-informed drill instructor at one of our basic training installations, this is not a self-cleaning weapon.
That myth may have come from the clean-burning powders Armalite loaded in all its test ammunition. A gun firing strictly commercial ammunition today may not need cleaning quite as often, but it still needs cleaning.
As with any other close-tolerance machine, lubrication is the operative word. The where, and how much, are as important. In Vietnam, many gas tubes rusted and froze into the gas key on top of the bolt carrier. Moisture would collect in this area and the rust that formed quickly locked everything together.
This could have been prevented by putting a drop of oil in the gas key and breaking the bolt lose once a day. Shooters in a humid climate like Louisiana or on one of the coasts, would be well advised to do this. If there is evidence of rust in the gas key, a scrubbing with Hoppes and a .22 bore brush will clear most of it out.
Be sure the gas channel to the bolt is clear, either with compressed air or a wire pipe cleaner. Another area that can contribute to sluggish operation, if not an all-out stoppage, is the rear of the bolt. Especially that part that rides inside the bolt carrier and contains the compression rings. This is the area that gets a direct shot of gas off the barrel and unlocks the bolt after the round is fired. Lots of carbon builds up in the carrier and on the bolt and can freeze the rings together.
This condition allows a lot of gas to blow by, retards the unlocking of the bolt, and might cause it to stick closed as well. A half-inch stainless-steel brush rotated with a drill and soaked in Hoppes solvent will clean out the bolt carrier, and scrubbing the bolt body with a steel-wire brush and Hoppes will cut the carbon from it as well.
The compression rings might have to be replaced and their channel cleaned in a similar manner. As with an automotive piston, replace the rings with the gaps well away from each other or you invite more blow-by as the gun is fired. Be sure to run a drop or two of oil in on the rings before going on. Carbon also tends to build up on the bolt-cam pin and in the cam recess on top of the carrier. Clean these areas well; proper locking and unlocking of the bolt may become affected if you don’t.
Pull the extractor and check the underside and the recess in the bolt body for carbon build-up. This can prevent the extractor from closing completely on the case rim and pulling it out of the chamber on firing. Check the tip of the extractor to see that there is no breakage, especially if the gun is a high-use item. Ensure that the extractor spring has enough tension and is not broken or collapsed. The extractor, its spring and retaining pin are considered high-loss, high-breakage items on this gun.
Check the tension on the ejector. If it is not on the stout side, consider replacing the spring behind it. This is another item that is well-served by a drop of oil on a regular basis.
The firing pin and its retaining pin are easily cleaned. These two parts, along with the bolt-cam pin, are other high-loss, high-breakage items that can be kept in the pistol grip trap or the storage compartment of the butt.
Kits containing these items might be considered for sale to customers who own this type of arm.
After assembling the bolt-carrier group, take a minute to put a few drops of oil around the bolt-cam pin and into the exhaust ports on the right side of the carrier. Work the bolt back and forth a couple of times and, with the bolt pushed to the rear, point it down and see if it stays in position. Then give it a snap downward and point it up to see of the bolt holds position there. If it moves in or out on its own weight, the rings are worn out and need to be replaced.
Run a thin line of oil down the bearing surfaces on either side of the gas key and the long rails on the bottom of the carrier before replacing it in the upper receiver. Before replacing the charging handle, lay a line of oil in the channel in top of the upper receiver, then reassemble the handle and carrier group into the receiver.
Note: Only rarely, in my experience, does the gas tube need to be removed, replaced, or cleaned. Leave it be. Normally, flushing out the lower receiver with solvent is about all that is needed unless a part needs to be repaired or replaced.
The pivot points of the hammer and trigger and the safety/selector lever can be oiled without removing them from the lower receiver. Hand function the parts to ensure proper operation. If the disconnector does not hold the hammer to the rear correctly or allows it to follow to the bolt forward, replacement of the spring, disconnect, or both, must be considered for obvious safety reasons.
If the spring is of adequate tension and the early release of the disconnector is only marginal or infrequent, an adjustment can be made that will allow the hammer to be held to the rear long enough for the transfer to the sear to be safely accomplished. Remove the trigger and disconnector and clamp the disconnector in a vise, bottom side up. Remove a small amount of material from the bottom of the projection on the front end that rests on the top of the trigger.
This will throw the hammer hook slightly forward to hold the hammer a fractional amount of time longer. It’s another of those cut-and-try operations and is best tested with a fully-assembled weapon, actuating the bolt by hand and letting it go forward under its own spring tension.
Take it slow, or replace a disconnector. It takes remarkably little trimming to correct this problem. Remove the buffer assembly and its spring and wipe out the tube with a rag on a shotgun rod. Check the buffer retainer for damage. If the tip is bent over badly or is about to break off, replace it or one day the gun will not break open for the buffer locking the two receiver parts together. Check the buffer for flat coils, which indicates a lot of mileage and a spring that may break.
Examine the buffer, too. Most likely, it won’t be damaged any place but on the front where the carrier hits it but if the ring that forms there is working toward 1/8-inch deep, replacement might be advisable, or you might find a lot of counterweights and washers in the bolt carrier one day.
Remember the saying about chicken soup? (Can’t hurt. Might help.) Wipe down the spring and reattach it to the buffer. Spray a good silicone lube into the tube and replace the buffer and the return spring.
If the gun had been dunked in water or been used out in the rain, pull the buttstock and check for any corrosion in the bottom end of the tube around the stock screw. A man could have a nasty surprise when the stock, buffer and spring fall off the gun as he takes it down off his shoulder.
A good dose of silicone lube can shortstop a lot of that corrosion. It also quiets that spring down a little bit as the bolt travels back and forth. This gun has a lot of little spring-loaded plungers all over it. The sights account for two of them, the bolt catch another, and it goes on. I have found it a good policy to give each and every one a shot of oil, or preferably, silicone spray. It will prevent the springs’ rusting and keep the plungers running freely.
There is nothing like making a sight adjustment and having the retaining plunger stay down where you just shoved it. Examine the firing-pin hole in the bolt-cam pin and the cam-pin hole in the bolt for any cracking. Either item should be replaced if a crack appears in the walls on either side of the holes. If this little jewel isn’t running as smoothly as you might like, there are a couple of steps we can take to slick it up a bit.
Begin by polishing up the hammer track on the bottom of the bolt carrier, running its full length. Polish the face of the hammer where it rides along this track. Polish the ends of the pin holes of the hammer and trigger, being careful not to take too much or they’ll walk around from side to side. Arkansas stone the cam angles on the disconnector and the matching surface on the hammer.
Again, don’t do too much or you’ll recreate the problem we corrected on the disconnector a while back.
Carefully polish the bottom bearing rails on the bolt carrier. If the trigger is especially gritty, careful dressing of the face of the cock notch of the hammer and the frontal area of the trigger that engages it can produce a markedly smoother trigger action. Use only the Arkansas stone for this work and go slowly.
Like 99 percent of the firearms in this world, the AR-15 and all its copies require as much care and cleaning as any mechanism of this type. It has some peculiarities like any gun, but most of it is, by me, just common sense. There is not now, and never has been a self-cleaning gun, and as long as they fire powder and ball, there never will be.


