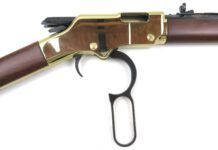
For most of my life, I’ve had a love affair with lever-action rifles and carbines. My first real gun was a Marlin 39-A, turned out of the factory in 1950. I became its owner that same year. Marlin hadn’t started its Micro-Groove barreling process then, but I’d put that gun up against any of the ones that do have it. In fact, I could do just that, because I still have it among many other lever and bolt rifles.
What never appealed to me about these lever-actions was the rough, bumpy, sticky actions most of them sported. I didn’t know as much as I should have about theses actions then, but I worked slowly and that Marlin turned out considerably smoother than when I got it. I should probably go back and rework it now, but it’s interesting to see what and how I was doing on them about 42 years ago.
Looking at how slick all the actions worked on the rifles I saw used in the old movies and later on television made me know they had something better going for them than what I was feeling on all the rifles around home. What I didn’t know at the time was that most of the “cowboy” rifles I’d been seeing weren’t Model 94 .30-30s, but Model 92s—probably in .38/40 or .44/40—that had been highly modified to fire blanks.
I had reworked many Winchester 94s and both the 336 and 94 Marlins, but I had never done a Model 92 until a friend of mine walked in with a little .357 Rossi carbine—a 16-incher at that. This gun was very tight, too tight for it to operate as he wanted it to as a working gun that goes with him almost everywhere.
Feeding was sticky and the gun seemed prone to jamming. Ejection put the spent cases in orbit, which bothered him, as he is also a reloader and he was losing about a third of his brass. He said he had worn out two thumbs trying to load the magazine, and wondered if I could do something about that, too. I don’t say any of this to downgrade the Rossi product. This one was a new imported gun that had to be thoroughly “lawyerized” before it would be allowed into the country. With time and use, it would probably have smoothed out some, but my friend just didn’t want to wait that long or rifle that much ammunition before that happened. As they say in books and movies, “that’s where I came in.”
The first order of business is to break the rifle down to its most minute components and wash all metal parts with a good solvent. If you’ve ever disassembled a Model 94, there isn’t a lot of difference in breaking down the 92. The Rossi has a coiled hammer spring and strut that can be disarmed with a paper clip or any pin that will fit through the hole in the strut. That’s about the only remarkable feature I noted.
There’s no need to remove the firing pin from the bolt unless you particularly want to for polishing. The loading gate can also remain in place, though the small spine on its back could probably use some deburring and polishing. My friend’s rifle needed this treatment, and your next lever-action job might also require it. Don’t remove the feed lips inside the receiver unless you have no other way to go. The flat spring that activates the cartridge stop is difficult to get back in place correctly. Trust me; I found out the hard way.
When the parts are dry, deburr (chamfer) all the holes in the trigger, hammer, carrier, and anywhere else a pin or screw will be going. I do this with a 1/4-inch and 1/8-inch carbide router with a rounded end. Do no more than it takes to get a clean bevel around the mouth of the holes. I’ve used an eggbeater drill at times, but mostly I do this by hand, turning the cutters with my fingers. This gets rid of any burrs or bled-in metal and creates a little “trap” for oil. It also helps when reassembling the rifle.
Next, smooth up the sides of the hammer, trigger, and carrier around the pivot points. Start with an India stone and finish out with fine emery. A turn on the rouge wheel might not hurt, but don’t do too much or the parts will start getting sloppy in the receiver. The flats on the sides of the bolt can stand some evening out with a smooth safe-edge file. Gently break all the corners below the top of the bolt with this file. Smooth out the camming surface on the bottom rear of the bolt. Make a few light passes on the back end of the firing pin; it’s a part of the camming process as well. Then finish this area out with fine emery and some serious work on the rouge wheel. This area is what cocks the hammer, and is one of the areas most responsible for either a smooth or scratchy action.
This is also a good time to polish the face of the hammer and the area at the top of the face that rides on the underside of the bolt. Look for the burnish marks the bolt has already left here, and just make these parts smoother.
As you probably have noted, the hammer rides in the raised front part of the lower tang after it is inserted in the rear of the receiver. The inside of the walls of this raised area should also be smoothed out. A fine safe-edge file will work. After removing the bluing, wrap some fine emery paper around the file and burnish these surfaces. Again, do not remove too much metal or you’ll create a sloppy hammer that could become unsafe.
The trigger does not do a lot of moving around in its position, but check to see that it operates freely. The polishing you did on its sides should be enough for it without having to do any work on the tang in that area.
The trigger on the 92 or copies like the Rossi is not as complicated as what you find on the 94 or the Marlins. It’s made in one piece and is the sear device in this gun. The contact surface on this trigger doesn’t need a lot of doctoring to become sensitive, so I don’t do much to it. I break the sharp edge of the contact point with just a couple of strokes on an Arkansas hard stone. To keep it from possibly snagging, I also break the end corners of this area with the same stone and let it go at that.
The cock notch on this hammer is very shallow, and I decline to do a lot more with it. If anything, I would be more inclined toward deepening the notch, but it is safe if left as is. The trigger spring is simply worked; bend it up and the trigger gets lighter. Bend it downward and it gets heavier. I break the corners on it as well, and highly polish the side contacting the trigger. Removing some material from the edges of the front half of this wide, flat spring will help to keep it from rubbing on the inside of the lower tang.
Now for the lock-up mechanism of the bolt. Unlike the Marlin and the Model 94—both of which have one-piece locking bolts at the rear of their breech bolts—the Model 92 has one on either side, controlled directly by the finger lever. The stiffness one finds in locking and unlocking the bolt is due only partly to tight-fitting locking bolts. To determine how much stoning or polishing they need, remove the ejector, its spring, and collar. Then reassemble the bolt, locking bolts, and finger lever, and operate the bolt by itself a few times. I break all corners slightly with an India stone, and scrub the front and rear edges of the locking bolts with fine emery mounted on a hard, flat block. The sides of the locking bolts usually don’t need a lot more than the emery treatment. With the breech bolt in battery, insert the locking bolts by hand. They should go into position smoothly without much more than a thumb push. Any rearward pressure that is felt is likely from the extractor. I don’t touch it unless the pressure is excessive and interferes with feeding.
Smooth out the camming surfaces on the forward edge of the bottom of the locking bolt recesses of the breechbolt, and dress the inside of those as well with an India stone and fine emery paper. Don’t remove a lot of material unless there is clear evidence that one locking bolt or the other is dragging very hard in its recess. Reassemble, oil the moving parts, and operate them again. You should find a considerable improvement in the action at this point. If it is not quite there yet, study the burnish marks on the various pieces and carefully stone or polish until it meets your expectations. Go slowly, remembering that you can always remove metal but it is hard to replace it when it is gone.
Remember what I said about the orbiting brass? The ejector assembly, with a super stout spring behind it, was the culprit. It was also part of the reason the bolt was so stiff to close. The tension increases as soon as there is a case rim pressing on it. That doesn’t do much for feeding either.
I trim back the spring until it takes a small amount of rearward pressure to pass the finger-lever pivot pin over the ejector stem and into the bolt body (with all the ejector parts in place). Polish the rear end of the ejector collar and the forward camming area on the front of the finger lever. Assemble the bolt, ejector parts, and the finger lever, and check the resulting ejector tension. Notice that the camming area on the finger lever increases the spring tension on the ejector as it is moved down, as it does in normal operation. If less tension is desired, grind off a bit more from the spring. Use a band sander or rotary stone to keep the end coils as flat and square as possible. The parts line up better that way. An alternative would be to substitute the Rossi spring for one of a smaller size wire that would still slip over the ejector stem and fit as before. Do not reduce tension to the degree that brass will not be thrown clear of the receiver, or your customer may find an empty in the mechanism along with the live round he’s trying to chamber.
The cartridge carrier in the 92 is not lifted by the finger lever as it is in the Marlins. Rather the finger lever bumps the bottom of the carrier and pushes it up into feeding position. The carrier is retained in its up or down position with a spring-loaded plunger in the left side. In the case of this .357 magnum carbine, the pressure was so great that the carrier was jammed against the right inside well of the receiver and obviously dragging. The pivot-screw holes may have been too large, allowing this to happen, because I have not seen the problem again. In this case, trimming some material off the right side of the carrier was necessary for good functioning. How much plunger tension should you remove or leave is pretty much up to you, as long as the carrier locks firmly in both positions of its function. Again, you’ll notice a marked decrease in the effort it takes to cycle the action. Polishing the plunger also helps.
Someone must have used the magazine spring from the 20-inch model, because about half as much more spring came out the front of the tube as was still in it. I cut off about half of what was protruding, and loading became much easier without any downgrading of the feeding—even the last round.
If cutting the magazine spring is needed or simply desired, take it slow or you may find that the last round doesn’t quite make it onto the carrier. Keep in mind that this spring is going to collapse a bit with use, especially if the gun is kept loaded most of the time. Polishing the outside of the bullet follower can make the operation a little smoother as well.
I’ve saved the most controversial procedure for last—cutting the hammer spring. Do you cut it or leave it alone? Since most lever-gun hammers are grossly overpowered, I usually do some modest cutting to help produce a smoother action. I begin by brightly polishing the stem of the hammer strut. I put the spring on a pin that closely fits the inside of it, and polish the spring on the rouge wheel. The wheel polishes the outside and the pin burnishes the inside, accomplishing two operations with one effort.
Again, how much you cut depends largely on what you hope to accomplish. If you want a movie-slick action, you’ll be running pretty close to the edge on ignition. Keep a good supply of primers handy for testing along the way. In the case of that .357 Rossi, I used small rifle primers. They’re harder than pistol primers, so I knew my hammer weight was good as long as I was getting detonation. I quit cutting the spring before detonation quit, so I’m not sure how light I could have gone while still getting reliable ignition. The gun left here with about 5.5 pounds on the trigger, but it felt like a whole lot less. The .44 magnum I’ve been working has the feel I want and a 3.5-pound trigger that detonates a primer if there’s a live one under the firing pin—every time it’s pulled. This is done with a hammer spring cut to 2.75 inches long (off the strut and fully expanded).
Our Team Said: Although there are mechanical differences between Marlin and Winchester rifles, and different models of Winchesters, these techniques can be used on all of them to varying degrees. The ideas transfer to different guns with a bit of study on what its parts are actually doing inside the receiver. Read the wear and burnish marks on the disassembled parts, and you’ll find it becomes almost like reading a map.


