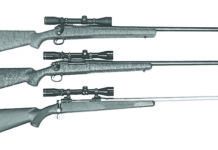
The Remington Model 700 is arguably one of the finest bolt-action rifles made today. It’s a highpower repeater, available in a variety of centerfire calibers. Two grades are available, the standard ADL and the BDL version, which has a floorplate built into the trigger guard.
The Model 700 is generally accurate, and other than those caused by dirt, few problems will be encountered. However, as we all know, nothing is perfect. At times, even the best rifles can suffer from problems. Some of the more common problems we’ve seen with the Remington 700s include loss of accuracy, bolt binds, failures to extract, misfiring, and failures to eject. Here are some solutions to these difficulties:
Loss of Accuracy
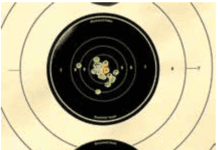
The Model 700 is known for its accuracy, so when a customer brings one in and says it shoots all over the paper, there is a good chance there’s a problem with the rifle. A quick check of the muzzle will show if the crowning or the rifling at the muzzle is damaged. Open the bolt and check to be sure that the rifle is unloaded. Shine a bore light into the receiver and inspect the rifling and the eccentricity of the crown. If there is any problem, place the barrel in a lathe, and turn back the barrel and recrown.
If the rifle still has the standard wood stock, the stock should be inspected next. If the stock is warped, the barrel could be forced out of alignment. To check the alignment of the barrel in the barrel channel, you will have to remove the barrel and action from the stock. Open the bolt and check to be sure that the rifle is unloaded. With the safety in the forward or fire position, press upward on the bolt-stop release located in front of the trigger. Pull the bolt to the rear and remove it from the rifle. Now unscrew the trig–ger-guard screws, remove them from the stock, and then remove the barrel and action.
Inspect the barrel channel of the stock. Like most bolt-action rifles, the Model 700 barrel rests only on a small area (about 1/2 inch) at the fore-end tip of the stock. Any glazed spots in the barrel channel indicate barrel contact with the wood. Pay particular attention to the area around the point where the barrel joins the receiver.
Coat the barrel with inletting black or Prussian blue (available from Brownells, Inc.) applied in a thin, even coat. Apply the black to the lower half of the barrel. Reinstall the barrel and receiver in the stock, and then reinstall the trigger screws and tighten. This will seat the barrel in the stock.
Remove the trigger-guard screws and the barreled action from the stock, and check the barrel channel again. Any high spot or warpage in the channel will be easily spotted. Using conventional inletting tools, any interference can be scraped away. Only a slight amount of scraping should be required to remove the unwanted contact points from the channel. If these areas are large and require a lot of scraping, I suggest replacing the stock. After the high spots have been removed, reseal the barrel channel with linseed oil or a similar sealer to prevent additional warping.
Metal fouling is not very common in the larger centerfire calibers. In smaller high-velocity cartridges, however, it is very common and can seriously affect accuracy. To eliminate this fouling, clean the bore using Outers Foul Out. This device electronically removes lead, rust, copper, and dirt from the bore. With a retail price of around $360, it’s expensive, but it works. Everyone can buy a solvent such as Hoppes Copper Solvent, Accu-bore, or J-B Bore Cleaner. Unfortunately, these solvents may still leave some fouling.
After removing the fouling, bore sight the rifle and check the accuracy with ammunition from different lots.
Bolt Binds
The Model 700 bolt is jeweled for smoothness. When the bolt does not operate smooth-ly, dirt is often the only problem. Remove and check the bolt and mating surfaces on the action for powder residue and dirt. Clean as necessary using powder solvent and a toothbrush. Dry the parts using a clean patch wrapped around a flat piece of brass or wood. Don’t use a screwdriver, as it could scratch and burr the metal of the receiver. When dry, oil lightly.
If the action is clean, check the mating surfaces for burrs. Also check for burrs on the ejector hole on the bolt, and check for sharp corners on the bolt lugs. If burrs or sharp corners are found, a small amount of filing, followed by honing and polishing with crocus cloth will remove them.
The extractor ring may be high, causing the bolt to be tight, or the extractor rivet may be loose. To correct this, remove the extractor ring and eliminate any high spots in the ring channel. Refit the ring and tighten the rivet, checking for smoothness. If this doesn’t solve the problem, replace the ring, using a new rivet.
Failures to Extract
Assuming the rifle is clean, check for a tight or rough chamber, using an unloaded, sized case. This should slide in and out of the chamber with little resistance. If the chamber is tight or rough, ream and repolish. If there is no problem in the chamber, fit a new extractor to the bolt.
Misfires
There are three causes of misfires—faulty ammunition, a broken firing pin, and dirt. Correcting an ammunition problem is very easy, and I don’t need to go into detail about it. To correct the other two problems, you will need to remove the firing pin from the bolt.
Start by removing the bolt assembly from the rifle as described earlier. With the bolt secured in a vice with padded jaws, use a wooden dowel to force the firing-pin head rearward until a coin or washer can be inserted in the slot near the back edge of the firing pin head. Unscrew the bolt plug and remove the firing pin assembly from the bolt. Check the end of the firing pin. It should be smooth and rounded. If not, it will need to be replaced. If the pin is not broken, clean all of the parts with a degreaser, and dry using compressed air. Lubricate the firing pin and main spring using a good gun grease.
The entire firing-pin assembly can be replaced as a unit, with no adjustment required, or you can replace only the firing pin. To replace the pin, you will need to disassemble this unit. Be careful: The main spring is compressed. A suitable holding device is required to prevent the firing pin and/or the firing-pin head from flying across the shop or into your eyes when the cross pin is removed.
With the firing pin held securely, compress the main spring by drawing the bolt plug toward the end of the firing pin. When the cross pin is exposed, hold the firing pin and firing-pin head securely and drive out the cross pin. Slowly release the tension on the main spring and disassemble the parts.
To install a new firing pin, drill a hole in its shank for the cross pin. Make sure the recess in the firing-pin head is clean, and assemble the firing-pin head to the new firing pin. Seat the shank of the new firing pin firmly into the firing-pin head. Using a No. 42 drill (.093″), drill through the cross-pin hole in the firing-pin head and through the new firing pin. Reassemble. Compress the main spring as before, and drive the cross pin through the firing-pin head and the shank of the new firing pin. Release the tension on the bolt plug. Clean and lubricate the firing pin and reassemble the bolt, again using a coin or washer to hold the firing-pin head.
The bolt must be cocked so that it can be installed. If it is uncocked, the firing-pin head will be recessed well into the bolt. To cock the bolt, place the bolt plug in a padded vice to prevent movement. Turn the bolt handle so the firing-pin head engages the cocking (higher) notch on the bolt.
Failures to Eject
This condition can be caused by dirt, burrs at the ejector hole of the bolt, a loose extractor rivet, or by the extractor dropping the shell. To correct the first two problems, you will need to remove the ejector from the bolt.
With the bolt removed from the rifle, drive out the ejector-retaining pin. The ejector will pop out of the bolt when the punch is removed. Pull the ejector spring from the hole in the bolt. Clean the ejector and the ejector hole using an aerosol cleaner. Check the hole and ejector for smoothness, and deburr the hole or replace the ejector as necessary. Dry the hole in the bolt using compressed air.
To reassemble the ejector parts, put the spring and the ejector in the bolt. Push the ejector in and hold it against the tension of the spring. Align the slot in the ejector with the pin hole and drive in the retaining pin.
When the problem has been corrected, be sure to thoroughly clean and oil the rifle before returning it to the customer. This little extra step will greatly be appreciated by your customer.


