Optics

Glock Night Sights: We Test Glow-in-the-Dark Aiming Aids

As a carry handgun, the Glock is rugged, reliable, and combat worthy. About the only modifications that actually improve the Glock are the addition of a better trigger and a set of aftermarket sights. We dealt extensively with the issue of trigger replacements in the April 2014. There, we installed a Zev Technologies' GlockWorx Ultimate kit from Brownells.com ($250, #100-006-566WB, Mfr. Part: ZTFULULT4G9BLK) into our Glock 17. We gave the Ultimate Kit an A grade, saying it "was the upgrade that produced the biggest difference in performance all by itself, increasing the accuracy of the Glock 17 from an average grouping of 2.3 inches down to 1.6 inches."

Also in the April 2014 issue, we looked at two sight-upgrade kits, both from Brownells. One was the Brownells Glock 17 Sight Upgrade Kit ($200, #080-000-919WB), which included a Meprolight (Kimber) ML-10224 Tru-Dot Night Sight System for Glock 17, 19, 22, 23, 31, 32, 33, 34, 35, 37, 38, 39; an MGW Glock Sight Adjustment Tool, and an Ed Brown Front Sight Tool for Glock. Since we had the installation tools handy, we also ordered a set of TruGlo tritium fiber-optic Brite-Sites ($90, #902-000-107WB, Mfr. Part: TG131GT1Y), yellow rear and green front. We chose to put the TruGlo sights on the Glock 17 and the Tru-Dots on a G34 so that we could shoot them side by side.

With the Ed Brown Front Sight Tool for Glock ($20 sold separately, #087-017-001WB, Mfr. Part: 952) and the MGW Glock Sight Mover ($100 sold separately, #584-045-017WB, Mfr. Part: MGW309) for the rear sight, we started the switch with a disassembly of the slide to get access to the front sight. With the Ed Brown front sight tool and a small crescent wrench, we loosened the screw beneath the sight and removed it, then replaced the white dot with the new TruGlo front sight and tightened with the crescent wrench. Once the front sight was swapped, we hooked the slide into the MGW. The device came with some thin plates to raise the slide up the right height. We did not need them. The old sight drifted out with relative ease, going left to right pointed away from us. The new rear TruGlo sight did require some minor fitting with a file and a little more strength to slide in, but with the MGW tool, leverage was not a problem. We used the same process to put the Meprolite sights onto a factory Glock 34.

Despite the new TruGlo sights being fixed like the originals, we found them to be much clearer and easier to acquire and reacquire targets. We took to the range with the TruGlo sights installed, using all other original parts, and we cut our average group size down by almost half an inch, from 2.3 inches with the standard Glock to 1.9 inches with the TruGlo sights. We turned down the lights over the shooters, leaving the targets illuminated to check out how much the tritium would glow in the fiber-optic sights. The green front sight was quite bright, while the rear yellow sights were significantly dimmer, although still visible.

The Meprolight Tru-Dots provided an even more impressive change on the G34. We shaved just over a full inch off our average group size at 10 yards once we installed them.

Upgrading fixed sights can seem like a challenge to someone who hasn't done work on pistols previously, but with these tools and the simplicity of Glock's designs, this upgrade is a great place to start if you want to attempt a DIY project. You can drift the sights out with a punch, which will save $100 for the MGW tool, but you risk rupturing the tritium capsules. The MGW mover requires oil on the crankshaft, but it made drifting the dovetail sights in and out so easy we quickly misplaced our punch set. Overall, we found the TruGlo sights to be a nice upgrade and would recommend putting them in place of the standard non-tritium sights on any factory Glock. We gave them a Grade: A ranking, along with the Meprolight Tru-Dot tritium.

Naturally, readers asked about other sights, so we began looking at more replacements we could test head to head, rather than as a general Glock upgrade. So, again working with Brownells, we assembled a sextet of night sights suitable for installation on various Glocks. Also, we believe you can broaden our recommendations to include other firearms of similar size — the visual presentation won't be appreciably different on different platforms — though the installation process may differ gun to gun.

Reflex Sights for Carry Guns: Leupold Bests Trijicon, Burris

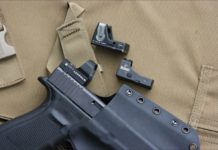
Adding a red-dot reflex sight to a carry pistol has pros and cons. First, the cons. The total cost of the weapon system nearly doubles as the sights are almost as expensive as the pistol, the sights have a larger footprint than the typical rear sight, battery life must be monitored, and foul weather can diminish the capability of the sight. The pros are the sights offer faster target acquisition and ease of aiming. The ability to shoot faster and more accurately in situations under 25 yards are strong reasons to make the switch from iron sights to a reflex sight, so we wanted to investigate mounting a reflex sight on a pistol to see how a reflex sight would work on a carry gun. We chose a Glock 20 Gen 4 as our test platform for two reasons. Glocks are popular pistols among LE and civilians and because the G20 is chambered in 10mm, which has comparable power to a 41 Magnum. We wanted to rattle the innards of these tiny sights to see if anything would fall out, get loose, or go out of zero. Even though the G20 is a full-size pistol, we have found that with the proper holster, like those from Bravo Concealment, and a concealing garment, the G20 can be invisible to the untrained eye.

A reflex sight allows an operator to keep both eyes open and view a target through a small curved glass lens, which has a reticle projected onto it. A light-emitting diode projects a red dot, amber chevron, or other aiming point, giving the operator an unlimited field of view since there is no magnification and the aiming point projects out to infinity. This means that parallax will not affect sighting; place the aiming point on a target, and if zeroed properly, the target will be hit.

Think of them as mini heads-up displays for your pistol.

Laser Rangefinders Under $200: Simmons, Nikon, and Redfield

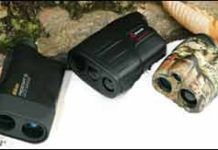
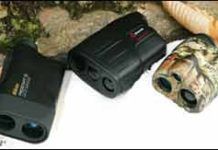
It does not matter what type of implement you use - modern firearm, muzzleloader, or bow - determining distance to your target is critical. For a primitive-weapons hunter, it means waiting until the beast comes into range. For a user of modern firearms, it might mean dialing in exactly the right amount of hold-over - or passing up a shot - on a trophy thats at the edge of your ability to shoot accurately. One of the fastest, easiest to use, and affordable means of accurately gauging distance to various targets is a laser rangefinder. Laser rangefinders are basically a monocular that send out a pulsating laser beam that bounces off a target back to the unit and provides an instantaneous readout in yards or meters. The laser is similar technology to that used in autofocus cameras.

The price of rangefinders is directly attributed to the quality of electronics of the rangefinder. More expensive rangefinders have lasers with less beam divergence, which is when the laser-beam diameter begins to spread out over distance. Instead of a tight, narrow beam, the beam becomes wider, like a cone, at the target end of the beam. The more beam divergence, the less accurate the distance reading. Those more expensive rangefinders also have more added features like a ballistic calculator, modes for use in rain or snow, different reticle choices, can range at farther distances, to name a few.

We recently tested three affordable laser rangefinders with similar maximum distances and features.

Illuminated-Reticle AR Scopes: We Prefer Leupold and Hi-Lux

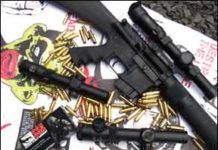
Low-power scopes with illuminated reticles bridge the gap between close-range red-dot sights and high-power scopes. These scopes are built with ARs in mind, but could be used on other types of rifles. We recently tested a trio of these dual-use optics, which were compact, lightweight, employed a 30mm tube with a small objective lens, and featured an illuminated reticle. The distinctive differences between them were the reticles. The players were the Leupold Model VX-R Patrol 1.25-4x20mm, $580; Hi-Luxs CMR 1-4x24mm, $400; and the Millett DMS-1 1-4x24mm, $405.

All three scopes featured a fast-focus ocular lens, came with a battery, wore a matte black finish, and had some magnification. The Millett and the Hi-Lux came with flip-up lens covers that allowed use of the fast focus on the ocular lens housing. The turrets for all scopes clearly indicated adjustment direction. Before any lead was fired downrange, we went through our usual battery of tests.

With the illuminated reticle turned on we whacked the scopes on a wooden bench to determine if a jolt would have an effect, slamming both the objective and ocular with enough force to drive a roofing nail. The scope reticles remained lit and turrets and magnification rings operated. They were then subjected to a deep freeze (-4 F) and then soaked in hot water to see if seals leaked. The Hi-Lux and the Leupold do not have turret covers; the Millett does. We kept the turret covers on the Millett so not to give the other two scopes an advantage. The scopes were unfazed by the cold, with controls working with ease. Fogging was anticipated when they were removed from the freezer to room temperature, and all three fogged slightly, giving a milky view that still could be used effectively. The Millett took the longest, about 5 minutes, to completely clear. When placed in hot water, the Hi-Lux expelled a string of bubbles from the magnification ring and illumination knob. We anticipated the worse, but found the Hi-Lux to be fine. There was no water in the scope to be seen and controls worked perfectly. The Millett spat out a few bubbles from the turret caps, but like the Hi-Lux was unaffected. The Leupold expelled no bubbles. The reticles stayed lit during the soaking.

All scopes had the same resolution, with a clear view up to the very edge of the lens. No scope seemed to have an advantage with color/contrast. It was during the brightness test at dusk when the Leupold showed its stuff. It by far used the most light and provided the most brightness, our testers agreed. The Hi-Lux came in second, then the Millett.

We did note that the Leupold and Millett reticles, when not illuminated, were the easiest to employ because of their thick, black crosshairs. The Hi-Lux had much finer crosshairs, and when not illuminated, took more time to see. The three scopes showed a signature at night that was apparent downrange when viewed head on. A slight red glow could be seen from the Leupolds and Milletts objectives; we could see a green glow from the Hi-Lux. Reticles were adjusted across a grid and brought back to zero with no issues. All three scopes passed the non-shooting tests, so they progressed to range testing.

Range time was broken into two segments. First was close-range shooting at 50 yards, and second was precision shooting at 100 yards. We shot with and without the reticle illuminated. Close range consisted of what we dubbed the Romero Routine. With zombie targets at 50 yards, the rifle was shouldered with the muzzle pointing down at about 45 degrees, then the shooter raised the barrel and squeezed off two shots as fast as he could into the cranial area of a Zombie Industries (ZombieIndustries.com) target. George Romero directed Night of the Living Dead in 1968, and from this cult classic we all know only head shots kill zombies. Then, from a benchrest at 100 yards, we shot the box to check tracking and return to zero. We also checked point of impact by shooting at minimum and maximum magnifications. Zombies at 100 yards were also on the agenda.

A Stag Arms Model 7 (StagArms.com) flattop in 6.8 SPC was used with a Leupold Mark 2 IMS (Integral Mounting System) with 30mm rings for all scopes. The Mark 2 IMS provided the correct height needed for an AR. Ammo consisted of Silver State Armory (SSArmory.com) cartridges loaded with 110-grain Nosler AccuBond bullets that zipped at 2550 fps. The combination of rifle, ammo, and any of the scopes were a good setup. They worked like a team. The scopes, which are all close in length and weight, balanced nicely on the rifle, placing weight between a shooters hands. Testers felt any of the scopes would work and work hard, but it was the subtle details of each scope that tipped the ratings. Heres what we discovered once the brass cooled.

Inexpensive Red Dot Sights-BSA, NcStar, Tasco, & Bushnell

Back in 1975, Aimpoint offered the first commercial red-dot sight. Those initial sights were heavy and good luck trying to find a replacement battery. Today's red-dot units are lighter and use batteries sold at convenience stores and gas stations, and as the weight of the sight decreased, so too did the price. One of our testers cringes at the price he paid for a used Aimpoint in the ‘80s. Today, he could purchase eight $50 modern red dots for the same money.

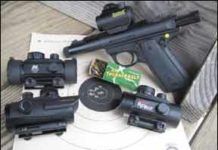
We wondered, however, if the sub-$50 red dots really did keep their utility as they got more affordable. To find out, we tested three affordable sights, the Tasco BKRD30 ($50), BSA Model RD30 ($40), and NcStar DBB130 ($40). To give us some contrast, we also tested a potential ringer, the Bushnell TRS-25, which costs about $100. Would the extra cost prove to be a good investment, or would the sights that cost half deliver similar performance to the Bushnell? Before we began range work with the red dots, they were shock-tested by dropping them on a wood floor from a height of 4 feet. The jolt had no effect on the sights; dots remained illuminated and the knobs still turned.

Next, the dots were activated with the turret covers left on and frozen at -4 F then soaked in hot water. Some of the instruction manuals stated the battery and turrets caps need to be secured when using the sights in extreme conditions. We abided and left the turret caps on. All had some type of pliable gasket on the turrets to seal out dust and moisture. So, too, did the battery compartments. There were no hiccups from the cold. In the water, all the sights released a few air bubbles form the rheostat knob, but again there were no malfunctions.

We used a Ruger 22/45 for range testing. Shooting was from a rest using a two-hand hold. We fired 40-grain Remington Thunderbolt cartridges with a velocity of 1255 fps at NRA 50-foot timed- and rapid-fire pistol targets.

All the sights had Picatinny rail or Weaver-style bases for mounting. The NcStar and BSA both had one clamp that was adjustable. The Tasco's mounts were fixed. The Bushnell had only one mounting clamp. All the clamps could be tightened with a flat screwdriver or coin. Only the Bushnell required a hex wrench, which was supplied with the sight. These sights are made to be zeroed and left alone, but we cranked the windage and elevation around the horn, while noting the number of clicks to see if they returned to zero. None of them did.

We also looked at the ability to pick up the dot with both eyes opened, consistency shot after shot, and ease of use. Here's what we thought about each unit.

Uncluttering Your AR-15 Rail: Pick Combo Laser/Light Grips

The AR-15's popularity is partially due to the weapon's modularity, light weight, and fast handling. But too much technology hung off every rail can morph the AR into an unwieldy and overly complicated rig—turning "tactical" into "tacticool."

Multifunction devices that combine optical laser and lighting into a vertical grip platform can help keep your rifle trim and uncluttered. We recently tested four such laser/light foregrips from three manufacturers. From MidwayUSA we bought two models made by Crimson Trace Corporation, the MVF-515 Red ($399, # 211142) and the MVF-515 Green ($599, # 812310). Both grips use a dual output 150-/200-lumen LED and feature independent controls for the light and laser. The now-discontinued but inexpensive Lasermax Colt AR-15 CGL Foregrip Laser ($161 at www.CheaperThanDirt.com, #61493) combines a red laser with a low-output LED for navigation lighting. At Sig's online store www.SigSauer.com, we found the Sig Sauer Stoplite STL-300J, $215, which combines a monstrous 700-lumen tactical light with a red laser.

Mil-Dot Scopes for Less Than $1500: Bushnell, Burris, Trijicon

When shopping for a rifle scope it is common to find a variety divided by purpose. Hunting scopes and tactical scopes are two popular categories. But should they really be listed so far apart? Just as the AR-15 platform continues to evolve as a hunting rifle, why shouldnt military-style optical scopes do the same? Tactical scopes are bred to provide an advantage over multiple targets at short to moderate distance, or an adversary at long range. For the hunter, this could translate to scenarios such as engaging rabbits in between their start and stop behavior or an elk standing far in the distance. Typically, the difference between tactical scopes is the reticle pattern and degree of magnification, depending on the application they were designed for. In this test we will favor the long-distance shooter and evaluate three Mil-Dot rifle scopes with variable power that tops out at 20X or above. They are the $1400 6-24X50mm Burris Xtreme Tactical Rifle scope No. 201934, the $999 6-21X50mm Bushnell Elite No. 42-6245T, and Trijicons $1275 TR23-2G 5-20X50mm AccuPoint scope.Each scope was built on a 30mm-diameter tube with a 50mm objective lens and a reticle wherein the vertical and horizontal crosshairs were strung with evenly spaced dots (Mil-Dots). All three scopes showed reticles in the first focal plane, and the knobs offered .25-MOA click adjustment. We chose this format because the reticle pattern can actually be used to "range" the target at any level of magnification using the following equation:Height or width of target in yards multiplied by 1000; divided by the apparent size of the target as measured against the Mil-Dot reticle, equaled distance.As you can see, you must know the approximate size of the target. When military or police snipers deal with the human torso, the measurement they typically use is 30 inches, or 0.833 yards. Game hunters merely need to insert the average height of the target area according to the animal they wish to engage, say from the bottom of the rib cage to the shoulder. The Mil-Dot reticle comes into play when you look through the scope and determine how tall the target appears when measured against the reticle. For example, if when placing the center of the crosshairs at the bottom of the target area the upper edge of the target sits midway between the second and third Mil-Dots, the lower part of the equation would be 2.5. Once distance is determined, elevation can be adjusted according to published data, such as a range card or "true statements" of elevation adjustment that the shooter has established through actual tests. In addition to its ranging ability, the Mil-Dot reticle offers another advantage over common crosshairs. Holding over for added elevation or holding off to fight wind drift becomes much easier with the additional visual aid of the Mil-Dots. This makes visualizing a hold that changes both windage and elevation much easier. Imagine the necessity to hold low and to the right. The shooter can then line up the shot first shifting the point of aim from the center of the crosshairs to the first Miil-Dot to the right of center. Then the point of aim can be dropped by lowering the rifle directly downward until the new horizontal point of reference is the first mil dot above the center of the crosshairs. If this point of aim proves not to be perfect, at least it will provide a substantial frame of reference for the next shot. Holding off center by say one Mil-Dot can also be effective when engaging a moving target. Indeed, the presence of the dots can also make it easier to visualize holding off by one-half the distance between Mil-Dots, and so on.Our comparison of the three scopes is accompanied by a chart showing basic information such as size, weight, etc. Weve also added a line for how many clicks were available from the windage and elevation knobs. This is important to know so that before transferring the same scope from one rifle to another, the scope can be returned to its mechanical center. By mechanical center we mean that if there are 300 clicks available from each knob, 150 clicks from full right or its lowest possible adjustment should put the reticle comfortably centered within the scope. Some calibers demand a lot of upward adjustment for really long range shooting. For example, the 308 Winchester (topped with a 175-grain bullet) typically asks for a 600-yard elevation adjustment of 14.75 MOA, or 59 clicks. But a 1000-yard shot would require approximately 36.75 MOA, or 147 clicks, and it is at the edges of the lens that vision will suffer from parallax, the apparent displacement or the difference in apparent direction of an object as seen from two different points not on a straight line with the object. We used a gentle grip when turning the knobs. Sensitivity to the clicks is a must.Testing scopes can however be limited in terms of hard facts. No two people see exactly alike, so whatever ratings may apply to the amount of light or quality of light transmitted to the shooters eyes could in the end be subjective. One of the visual aids we used was a $15 lifesize Coyote target from Caldwell that featured detailed vitals and replaceable overlays (No. 800345). Set afield at a distance of 100 yards, we peered through each scope and compared how well we could pick out the reticle against the realistic montage of coyote fur. Immediately next to the Coyote target was a typical range target for comparison. All three scopes allowed us to shoot sub-MOA groups at the heart, lung, and base of the neck bone on the Caldwell target. We wrapped up our tests with a hike over private land that allowed us to focus on (but not shoot at) a variety of distances and back drops.Aside from the subjective viewing, we did the best we could to judge how well each scope performed as they were designed to. For example, the calibration of the Mil-Dots had to be consistent and offer predictability. After zeroing each scope, we held off 2 Mil-Dots to the right and to the left, firing five shot groups for each hold. Were all four groups the same distance from center? We referred to this as our hold-off test. We tried to minimize shooter error and effects of the environment (wind and light), by performing these tests from 50 yards. Our mechanical tests were performed with the scopes at maximum magnification.We called our next test the crank test because we cranked the windage elevation 4 MOA (16 clicks) right and left and fired 5-shot groups. We repeated this exercise with the elevation knob first down then up. We chose to move downward first because, in our experience, some scope springs have more difficulty recovering from compression than from expansion. Again, we fired five-shot groups. Was each group printed equidistant from our original point of aim? Were they level and on line with the central group? Did returning the adjustment knobs back to center realign the reticle so that hits were centered at our original point of aim?Each scope was pre-mounted using rings and bases available from Brownells. That way, the scopes could be quickly interchanged from atop the Picatinny rail as a solid unit.Our test ammunition for the 50-yard shots was the Sellier & Bellot 55-grain FMJ ammunition. For our longer-distance testing, we relied upon a handload featuring 69-grain Sierra bullets over Varget powder, proven to deliver sub-MOA groups from our test rifle. In terms of durability from shock or recoil, we realize that firing 223 Remington was not a harsh challenge. But we werent about to use the scopes as hammers, either. Each scope was backed by a lifetime warranty, and in our view only the longest period of testing will determine the durability of these products.

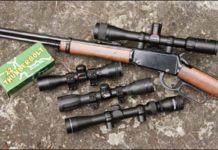
Rimfire Riflescopes Under $50: Bubbles Sink TruGlo and BSA

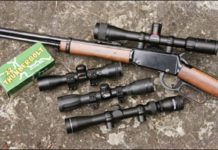
At one time optics for a rimfire rifle meant a scope with a 0.75-inch tube-including objective-and no adjustable magnification. You could also get it with any reticle type you wanted as long as it was a traditional crosshair. You can still purchase these types of scopes, but todays rimfire scopes share a lot in common with centerfire scopes. They come in 1-inch tubes and have adjustable magnification, parallax adjustment, and an assortment of reticle types.We were interested to see if low cost-around $50-had any relationship to quality and usability. Our test products were the TruGlo 4x32mm Model TG8504BR, $50; the BSA 22 Special Model S4X32WR, $40; Tascos 22 Riflescope 3-9x32mm Model MAG39X32D, $50; and the Simmons 22 Mag Riflescope 3-9x32mm 511072, $52.Before we did any range work with the scopes, we performed a shock test by whacking the scope on a wooden bench to determine if a jolt would have an effect. Next, we removed turret covers and froze the scopes in a -4 degree freezer and soaked them in a sink of hot water to see if seals leaked, making the scope susceptible to moisture build up. We then mounted the scopes for a side-by-side test on a platform and looked for resolution, brightness, contrast, parallax, tracking and repeatability. If scopes passed these phases of test, we finally we mounted them on a rifle for range testing. At the range, we looked for tracking by "shooting the box" and point-of-impact change with the variable-powered models by shooting at minimum and maximum power magnifications. We shot from a bench rest at 50 yards at the Fin Fur Feather Club in Chaplin, Connecticut.As a test platform we used a Henry Repeating Arms Company H001 lever action in 22 LR. The Henry is like many rimfire rifles with a groove built into the receiver to accept Weaver-type rings. The Henry is an inexpensive plinker and small-game stopper. We loaded it with Remingtons Thunderbolt cartridges with a 40-grain bullet and a velocity of 1255 fps. Lets see how these inexpensive scopes could perform on marauding soda cans or help keep the varmint population in check.

Red-Dot Sights from Aimpoint, Insight Technology, and Vortex

Why does an illuminated dot provide faster recognition for the shooter? First and foremost, the illuminated dot is the brightest object in the field of view. This brings your eye to the dot like a magnet. The key to shooting quickly with an illuminated dot is to focus on the target with the dot in your peripheral vision. Find your desired point of impact, cover it with the dot, and fire.

In this test we will be evaluating several aspects that we think should be considered when choosing an electronic dot scope. Ease of mounting and sighting in, durability in terms of function and repeatable adjustment, and quality of vision regarding the dot and its surrounding field of view. To test we enlisted the help of two rifles. They were the Smith & Wesson M&P 15-22 and the Marlin 1895SBL. The M&P 15-22 was tested in our February 2010 issue and fires 22LR ammunition. The Marlin 1895SBL is a big-bore lever-action rifle that shoots fat 45-70 cartridges, (www.marlinfirearms.com/Firearms/bigbore/1895SBL.asp). We began by sighting in each scope atop the Marlin 1895SBL and firing from the 100-yard line at Phil Oxleys Impact Zone (www.theimpactzonerange.com). Here we used Remington 405-grain soft points (R4570G) and PMC 405-grain lead flat point ammunition. Next, we fired at a multiple target array to experience what each scope had to offer in terms of rapid acquisition. For this portion of our test we fired Winchester 300-grain JHP rounds (X4570H). We chose the hefty Marlin for two reasons. First, it supplied enough recoil to challenge the durability of the scopes. Next, working its lever action provided an extra interruption to sight alignment above and beyond the recoil impulse. Our target array consisted of five cardboard IPSC targets for backing arranged in a triangle or "Christmas tree" pattern. Point of aim was a Reckstine Sight-In Target fixed at center mass on each backing. Actual distance from the shooter for each target was, left to right, 22.5 feet, 33 feet, 47 feet, 39 feet and 23 feet. Exercise One was to engage all targets with one round each moving from left to right. Start position was shooter facing downrange muzzle pointing towards the ground about 2 feet in front of the shooter. A round was in the chamber with four rounds in the magazine. The hammer was back and the crossbolt safety was activated. Exercise One was attempted two times and we recorded total elapsed time for each run. We also took note of shot placement on each target.

[IMGCAP(2)]

For Exercise Two we changed to fresh Reckstine Sight-In Targets on each backing. Exercise Two required that the shooter begin with the furthest target at the top of the triangle. Order of engagement continued with the furthest target to the left, the furthest target to the right and then left to right on the pair of near targets. Again, we recorded total elapsed time and made note of shot placement. Each scope was tested in this manner and the shooter was allowed to dry fire each exercise before firing beginning each exercise. In fact, we recorded the elapsed time of the very first dry fire run, from audible start signal to the final drop of the hammer. We used this to set a par time on our Competition Electronics shot recording timer. This provided an audible structure against which to measure our dry fire practice.

The Smith & Wesson M&P 15-22 AR-15 style rimfire carbine was used primarily to test repeatability of zero. We began by undoing all previous adjustments. This meant centering the dot inside the scope. We did this by turning down the elevation screw until it stopped, then turning it in the upwards direction counting each click until the screw stopped again at its maximum elevation. This takes concentration, patience, and a soft touch so not to damage the mechanism. We then divided the number of clicks by two and turned the screw back to its mechanical center point. We repeated this chore with the windage adjustment. It is important to begin with the adjustments at center because this offers the greatest amount of potential adjustment and the least amount of strain on the adjustment mechanism. In addition, we believe that even without magnification, the center of a given lens is the point at which it is most visually efficient.

For our repeatability tests we visited the 25-yard line at American Shooting Centers, (www.amshootcenters.com). From the bench we zeroed each scope. Then we turned the windage adjustment 10 clicks left and shot a group. Next, we turned the adjustment 20 clicks to the right and shot another group. Finally, we adjusted the scope 10 clicks to the left and looked for a group with its center over the original point of zero. On our test days we did our best to wait out any gusts of wind that might skew our windage test and judged accordingly. We repeated this test for elevation adjustment by going 10 clicks up, 20 clicks down and then 10 clicks up. We think dot scopes will rarely be used like a mil-dot tactical scope (for example, dialing in changes and returning to zero), but we hoped this test would simulate longer term use that would likely include being readjusted for use on any number of rifles or handguns. Would one scope stand out from the others? Lets light them up and see what happens.

Worrisome Questions From SCOTUS

I am uneasy after hearing oral arguments in the Supreme Court case, Garland v. VanDerStok, and reviewing a transcript from the October 8, 2024 session....