The original Henry rifle saw the light of day in 1860. It was an invention of B. Tyler Henry, who was hired by Oliver Winchester around the time the company took the name of New Haven Arms Co. Before that, the company, in which Mr. Winchester owned much of the stock, was named Volcanic Arms Co., and included both Mr. Smith and Mr. Wesson. Due to financial problems, the control of the Volcanic company passed to Mr. Winchester, who was a majority stock holder. Marketing of the 15-shot repeating Henry began in 1862, and quite a few were sold to soldiers of the Civil War. Most of the Henry rifles had brass frames, but some were of iron. The Henry rifle took a rimfire 44-caliber cartridge, known as the 44 Henry Flat, that fired a 200-grain or, slightly later, 216-grain bullet at about 1100 fps. The later bullet had a larger flat area on the nose. After the Civil War, the Henry rifle was redesigned into the side-loading 1866, the first rifle to carry the Winchester name. It again generally had a brass frame and used the 44 rimfire cartridge. Then came the 1873 Winchester and with it, the rimfire cartridge gave way to the 44-40 centerfire. A few revolvers, including the 1873 Colt Peacemaker, were chambered for the 44 rimfire, and once the idea of one cartridge for both long and short guns caught on, a great many period revolvers were chambered for the 44-40, originally a rifle cartridge. Having his sidearm and long gun in the same caliber was mighty handy when you were a long way from nowhere, much less any supply center. Neither the 44 Henry nor the 44-40 cartridge was suitable for buffalo, but did good work on deer and similar-size targets.
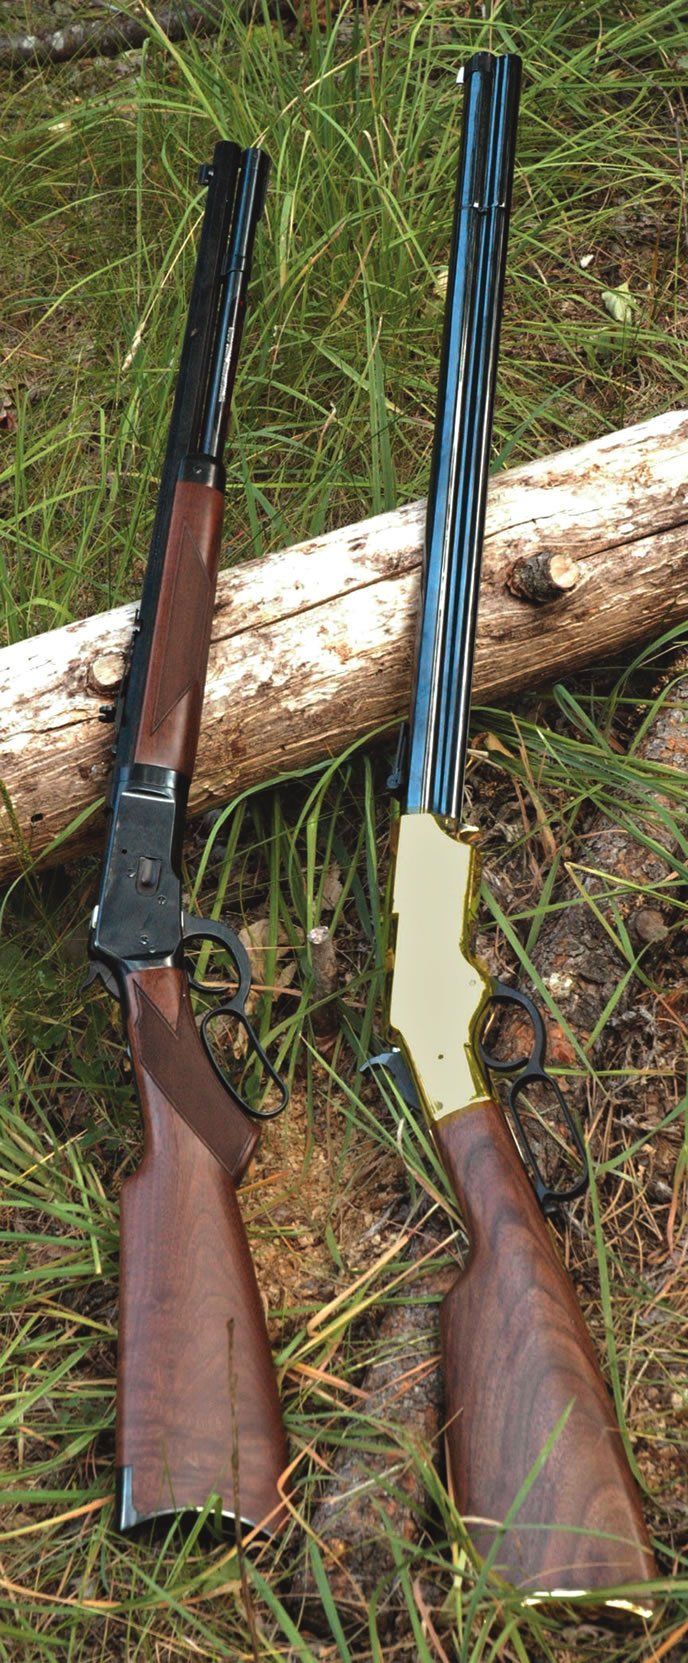
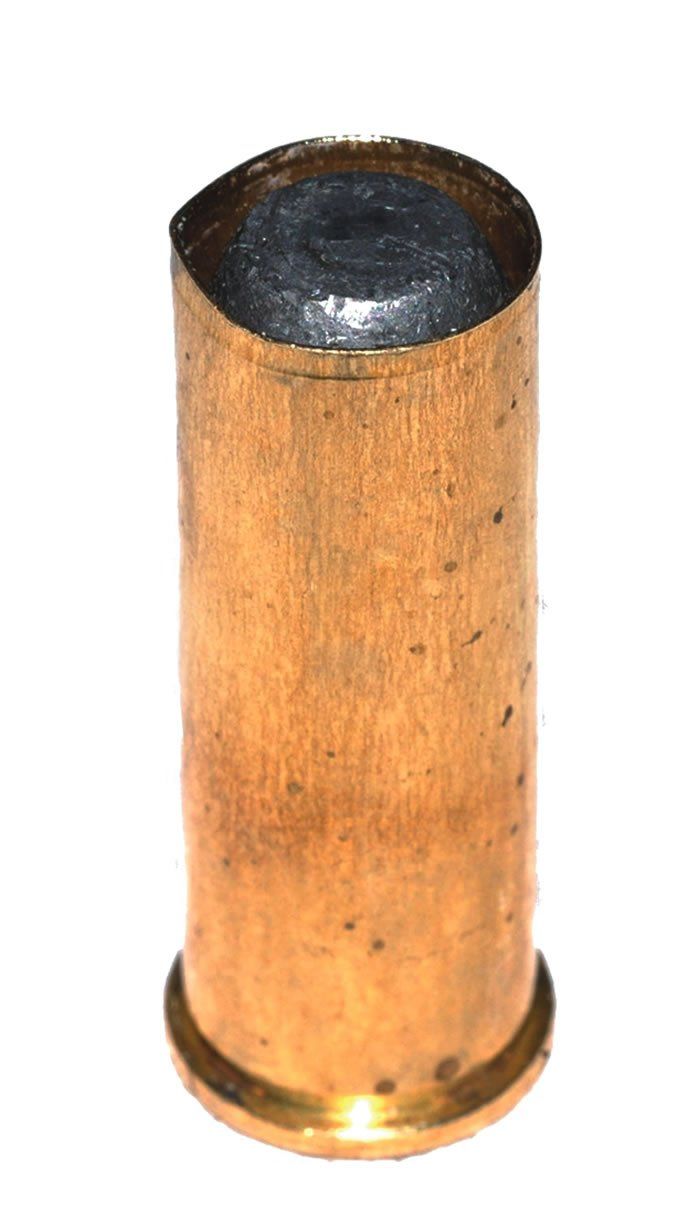
To see how these historical rifles and cartridges fare today, we got the loan of a new, U.S.-made Henry rifle and also a new Japanese-made Winchester 1892, both in 44-40 WCF. We tested them with a Black Hills Cowboy Action load, a 200-grain round-nose soft point. Here’s what we found.
Henry Original Rifle Model H011 44-40 WCF, $2300
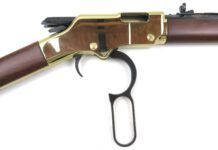
This rifle presented us with a lovely, flat, polished-brass surface on its nicely made action. The brass was glossy as a mirror, well protected in the box against marring. The highly polished, deep blue of the barrel made a nice, if inappropriate, contrast, and the walnut of the short stock was a really decent chunk of wood. The crescent butt plate was also brass, as was the magazine follower. The lever was blued steel as was its lock. There was a trap door in the butt with a hole 7.5 inches deep, big enough to hold a bunch of cartridges or what-have-you. While the overall look of the Henry Original lever-action rifle was eye-catching, it could have been a whole lot better looking, we thought.
The biggest problem was the octagonal barrel, and we eventually decided we could not live with it. All its corners were so badly buffed that it was nearly round in some places. The flats of the barrel were anything but flat. Compared to originals, or to the Winchester 1892 against which we tested this rifle, or to the Uberti Henry version that sells for $900 less, this barrel looked like a reblue done by an amateur home gunsmith with access to a powerful buffing wheel and very little skill in its use. The rounded, dished edges were also glaringly apparent between the barrel proper and the rotating five inches of the barrel up front, the edges dipping inward toward the separation point, emphasizing it. The steel was all polished like a mirror, but that’s all wrong. Originals would have been rust blued, which imparts a dull but rich look. To look right, each of the five remaining sides of the octagonal barrel should have been dead flat, the edges between flats quite sharp, and the bluing should have been a good deal less shiny. We thought the barrel treatment was a tragedy because a great deal of effort went into making this an extremely close copy of an original Henry in look, operation, barrel length, stock and action configuration, and sights.
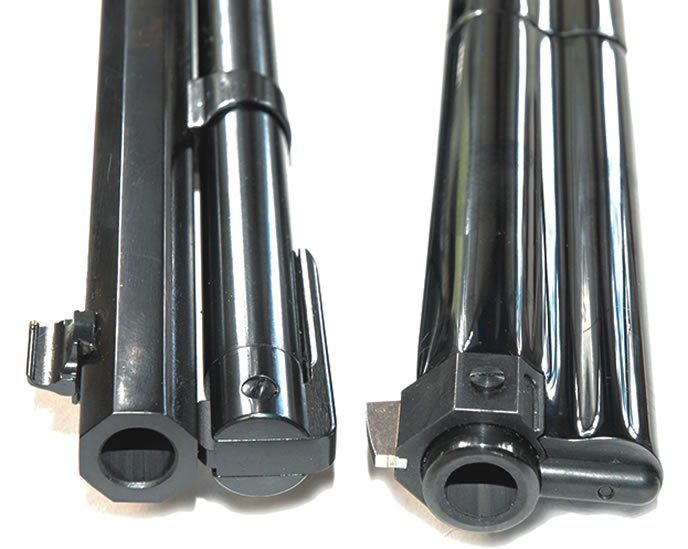
The magazine is integral with the barrel. The bottom of the magazine is slotted full-length for the cartridge follower. The inletting, what little of it there is, is excellent. If someone wanted to spend more time and effort on this already somewhat costly rifle, he could draw file the barrel flats, and then rust blue the steel parts. If one goes to all that trouble, he might consider getting the receiver engraved, something like the 1-of-1000 version of this rifle ($3500). And if one goes to all that trouble, the finish on the excellent wood can be scraped off and the wood can be given a decent oil finish. What’s on there does not bring out all the fine wood has to offer (it looks milky in some light), though it protects it quite well. We believe that because Henry Rifles went to the extreme trouble to make this rifle within the U.S., they also ought to have figured out how to make the barrel look right.
One of our staff owned an original 1873 Winchester octagonal-barrel rifle made in 1875, in pristine condition. It looked fabulous, and that’s what Henry needs to do with this rifle. Of course the modern owner can just overlook this history and enjoy shooting this rifle.
The Henry instruction manual is one of the worst we’ve seen. The rifle came with both a written manual and a disk that you stick in your computer to find out how to disassemble and reassemble your rifle. But what if you don’t have a computer? What if the disk is broken, as ours was? The flimsy little disk got shattered into several pieces before we could use it, so it was entirely useless. The written manual needs to contain all the instructions on loading and unloading, and any disassembly notes for the rifle that anyone might ever need, never mind what’s on the disk. The manual did not have that information. How do you open the magazine? Not in there. Did the rifle’s lever need to be open or closed during that process? Not clearly spelled out. We read through the foggy manual and eventually found out how to open the magazine, but what about the proper lever position during loading? The last sentence in Step 1 of the loading procedure: “Do not push the loading lever forward.” Okay, that means it has to remain closed, essentially in the firing position, during the loading operation. But wait! The first sentence in Step 2 of the loading procedure is: “First make sure the loading lever is fully forward.” Huh?
Because we understand the operation of such firearms, it was easy for us to understand that yes, the lever could be in the fully open position, all the way forward, to load the rifle. That will keep the first round out of the carrier until the lever is closed. But with the bolt closed, the first round will go into the carrier, ready and waiting for the first cycle of the lever. Bottom line, it does not seem to matter what position the lever is in during the loading process. In either case the rifle’s chamber will not be loaded until the loading lever passes through one full cycle. If the lever is fully open when you load the magazine, the carrier stays empty. The lever can simply be closed without picking up the first cartridge. With the lever closed, the carrier will receive the first cartridge you put into the rifle, but it won’t raise that cartridge up to the chamber until you move the lever fully open and close it again. You can load one more round into the magazine by leaving the lever closed during the charging process. Further, with the lever left closed, the hammer is not cocked and doesn’t have to be lowered if you want to carry the rifle with the magazine loaded and the chamber empty. We were able to load 13 rounds into the magazine. Another round could be stuck into the chamber to make it 14, but we didn’t like that idea because it puts your hands at the front of the rifle with a round all ready to go in the chamber.
But how do you get the magazine open to load your rounds? The forward five inches of barrel is actually a collar that pivots to the side, which opens the magazine tube for the insertion of cartridges. The instructions did not tell us how to pivot the collar to the side, not in so many words. Here’s how: There’s a brass magazine follower driven by a long spring within the magazine tube. With the rifle empty, this brass piece sits just in front of the action. To open the magazine, first make sure the rifle is empty of all live cartridges by cycling the lever carefully to eject each round. Your hands will be near or in front of the muzzle during the loading procedure, so you don’t want any rounds in the rifle. Then pull that brass follower all the way to the muzzle and, as we found, use great strength and lots of wiggling to finally force the carrier a little farther toward the muzzle so the forward five inches of the muzzle can be pivoted to the side. This reveals the open end of the magazine tube, into which you put your cartridges. Our rifle’s magazine-opening operation was exceedingly stiff at first. We worked it time and again, and finally it started to work more easily, as the burrs or whatever was in there got worn down. With the magazine open, put your desired number of rounds into the magazine, and it’s a good idea to tip the rifle so they slide down easily instead of dropping full-length against the previous round’s nose. Be sure to use only flat-nose bullets.
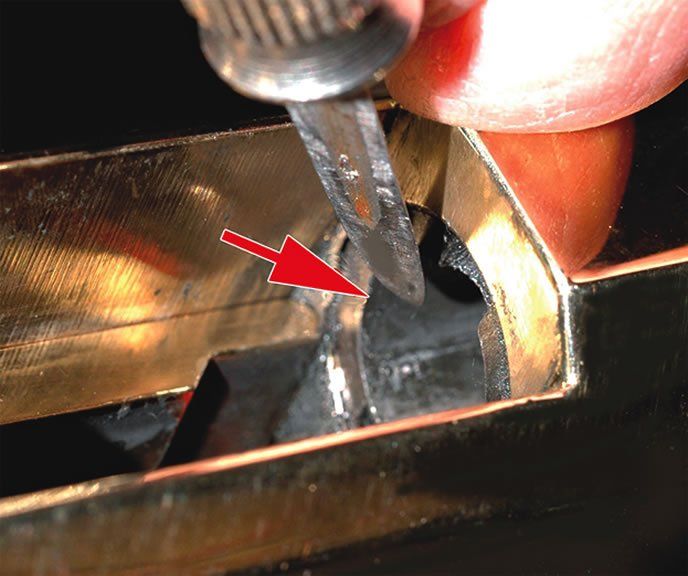
Once you have all the desired cartridges into the magazine, control the follower with your thumb and twist the muzzle extension back into line and gently ease the follower down to rest on the nose of the last cartridge in the magazine. We had a slip during early testing, and the follower slammed down onto the last of four cartridges in the magazine. The force drove the bullet into the cartridge case. At the very least this would raise pressure, but could also cause a nasty jam if you loaded another few rounds on top of the damaged one. The damaged round did not feed easily, so it had to be coaxed into the chamber and then ejected back out.
On the range we found the Henry’s feeding to be sticky. Closing the lever the last little bit took some force. That got better as we went along. Also, more to the point, the feeding was entirely smooth with a different batch of the same ammo, so the problem seems to have been due to a cartridge-length variance. The rounds lifted into line with the chamber easily, but during the final closing of the lever, the lever was sometimes reluctant to go all the way home. We found a razor-sharp burr on the back of the chamber, which might have interfered with the headspace enough to cause stickiness. We deburred the sharp edge, but didn’t notice a significant change. We encountered this occasional stickiness as the carrier was being driven downward during the last bit of lever movement. As noted, ongoing use tended to smooth it up, and by the end of our testing it was a minor issue.
On the range, our first three shots at 25 yards to verify the sights put two shots nearly touching and a third about 2.5 inches away. The hits were two inches high and two inches left. A tap or two on the rear sight slid it in its dovetail enough to get the hits centered. From the machine rest at 50 yards, the Henry put its three-shot groups into 1.5 inches on average. The trigger was extremely stiff at 9.6 pounds and with a slight touch of creep. We wanted it a lot lighter. Our hits at 50 yards were about three inches above the point of aim, which we thought was close enough. There is no manual adjustment for elevation on the normal leaf, but the rear sight rotated to present an adjustable ladder sight for extreme distance. This would be fun at some shoots that have an optional distant target for extra points.
Our Team Said: While this rifle is not inexpensive, we believe many will like it for Cowboy Action shooting, or to just have something a little bit different from all the other rifles in one’s collection. Accuracy was entirely adequate, we thought, the limit being the sights and the shooter’s eyes. We suggest a heavy coat of wax be applied to the brass bits because the balance point puts the forward part of the receiver in one’s hand, and the shiny brass won’t stay shiny long with normal abrasion from carrying the rifle. Overall, we’d give this rifle a C grade. We personally would not buy it. Henry needs desperately to fix the awful barrel polishing, reduce the trigger pull by half, and fix the poor owner’s manual. We’d give them an A+ for the concept of recreating an historic all-American rifle within the U.S. Now it needs to be done right.
Winchester 1892 Limited Series Deluxe Takedown 534154140 44-40 WCF, $1900
Our sources say only 500 of these were made in this caliber in 2008, and a further 500 in 45 LC, so the price is relatively moot. We found one for sale on GunsInternational.com for $1865, and found a recent sale of one NIB on GunsAmerica.com for $1695. If you want one and can find one, pay what’s demanded and be glad you have it.

The test rifle had a 20-inch octagonal barrel with flats like the Henry ought to have had, and a dull finish that resembles rust bluing. Made by Miroku in Japan, the Winchester gives good evidence the Japanese do a far better job of octagonal-barrel rifle finishing than comparable U.S. companies. To wit: the flats are dead flat, no waviness end for end, and the corners between the flats are as sharp as they need to be for best appearance. The bluing is not shiny but not dull, actually a close approximation to early rust bluing. The barrel flats are, however, blemished with the impressed stamping of the rifle name, caliber designation, company name, trademark notice, and importer’s name. They might as well have included the names of Oliver Winchester, his grandmother, his dog, where he is buried, and his phone number. All of that stuff does not belong on the barrel, ruining the appearance of an otherwise classy rifle. If importation demands it, hide it somewhere.
Inletting, metal and wood work, polishing and bluing were all first class. The wood, however, had a milky look in some light, as did the Henry. However, there was no open grain, and the finish was both dull and hard, offering great protection to the rifle. One problem with non-oil modern finishes is that once the finish is indeed marred, it’s difficult to hide the marring. With an oiled stock, marring is much easier, and the dent might remain, but a wipe with linseed oil will take care of the overall looks quickly and easily.
This rifle had a nice feature in the form of a tang safety that blocked the hammer from going all the way forward. Some of us didn’t like it because it might induce the hunter to carry the rifle with the hammer cocked and the safety on. We believe the hammer ought to be down until you’re ready to shoot. Cocking it as the rifle is brought to the shoulder is easy and noiseless, and just as fast as shoving the tang safety forward. The hammer cannot strike the firing pin unless the trigger is pulled, so carrying the rifle with a round in the chamber and the hammer down is entirely safe. The tang safety can well be used after chambering a round and before lowering the hammer. Another good use is to keep the tang safety in the safe position when you need to cycle live rounds out of the rifle to unload it.
The rear sight was the dreadful early buckhorn style. Even the original (ca. 1862) Henry rifles had a superior rear sight. This one blocks too much of the landscape, and though it might be original, enough of the rest of the rifle is not original, so why not put a decent rear sight on it? Windage was by drifting, as on the Henry, and elevation was by a wedge. The front bead had a gold insert. The front blade was fitted in a dovetail, but it didn’t match the barrel height. The front and rear of the front sight hung in the breeze, quite slipshod in appearance. A rifle costing nearly $2000 ought to have a better-fitting front-sight blade. They might cost all of 50 cents when bought in bulk. The makers clearly used what they had on hand instead of a sight made specifically for this rifle.
The stock wood was of excellent-quality walnut, and it had a semi-pistol grip that we liked. It gave good control of the rifle. The checkering was attractive and functional. The action was smooth and it locked tightly, our inspection showed.
Now, then, how do we take the rifle down? Read the excellent manual that comes with the rifle first, and all will be answered. The short version: Unload the rifle, fully open the lever, drop down the little lever under the muzzle, and unscrew the magazine from the rifle at least five full turns. Then grasp the barrel and action at the splitting point and unscrew it a quarter turn. Carefully remove the forward part and don’t bang up the interrupted thread that holds it together. Such a design on a lever rifle makes keeping the barrel clean a lot easier. To put it back together, reverse the process. Remember that the little lever at the end of the magazine tube fits into a notch under the barrel, so take care to line it up and don’t force it, and that notch will stay pristine a long time.

We wiped the rifle inside and out with oil, per the instructions, to rid it of preservative, and took it to the range. There we discovered a very smooth rifle with a far better trigger than on the Henry. However, the sights were just as hard to see, and though we got some decent groups, we feel that the eyesight of the shooter and lighting conditions will affect the proven accuracy as much as any variance in ammo types. Our Winchester averaged 1.8-inch groups. We had to raise the rear sight significantly, to the second notch of five, to get our hits centered at 50 yards. With the sight all the way down, the shots landed a good nine inches low. Windage was perfect.
Our Team Said: We much preferred the feel and balance of the Winchester to that of the Henry, much as, we suppose, Western cowboys and travelers preferred it when both rifles were essentially new to the world. We would prefer the Winchester over the heavy Henry with its earlier design, but both worked in outstanding manners to capture the spirit of the old West. If we were going Cowboy Action shooting we’d surely acquire one of the Winchesters over the Henry. No, it’s not quite as much a chunk of history, but it’s a great little rifle. That means it weighs a lot less than the Henry, and was far more lively. We’d certainly change that rear sight, and we might also put a post instead of a bead up front, but that’s a personal preference. We’d buy the 1892 in a heartbeat.
Written and photographed by Ray Ordorica, using evaluations from Gun Tests team testers.


